


Because my work schedule varies so wildly (I either start work at 5:30 pm or 10 am or 1 or 2 pm), so does my sleep schedule.
And because of that, I feel like a zombie.
And zombies don't bake.
I think.
I'm pretty sure they prefer their brains raw.
But I digress.
With this recipe comes another side of excuses. It seems to be my MO lately, but such is life. I finally have enough money to properly bake, but of course I don't have the time to do it as often as I'd like.
Life, eh?
And starting at the end of May, I'll be in culinary school (yahoo!), so there's another obstacle.
But on the other hand, it'll teach me new things to do, though I won't be doing pastry for a while yet.
ANYWHOO, ON TO PICS AND THE RECIPE.
I kept looking for recipes to use, because I'd never made one of these before, but none of them /seemed/ right. So I just used my own sponge recipe, and my own stabilized whipped cream recipe. None of the recipes I saw for the whipped cream had enough gelatin, and I wanted it to set up really well, so it would slice cleanly.
Anyway, I think I got it, but next time, instead of just slicing the strawberries in half, I'll chop them up and mix them into the cream. It looks nicer sliced, but it's harder to get through them with your fork without smashing the cake to bits, haha.
I really really like this cake better than the American version. I much prefer the delicate sponge over a biscuit base. And the stiffer cream is nicer. And it's prettier. So Japan wins this one :)

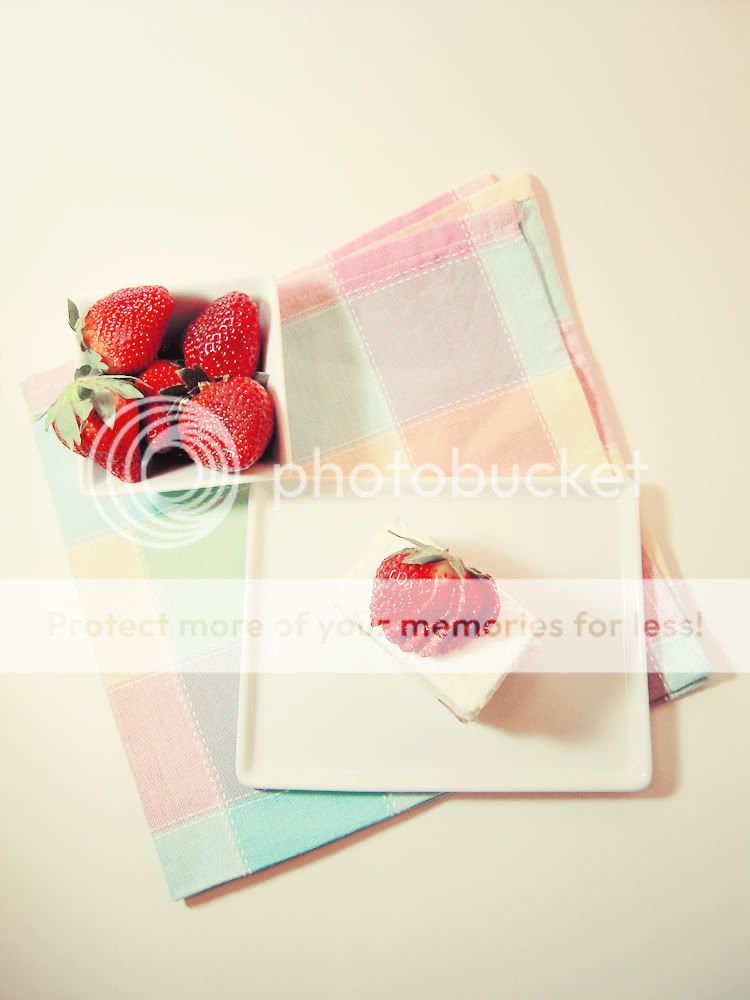


Japanese Strawberry Shortcake:
Sponge cake:
3 eggs, separated
1 whole egg
50 g flour
50 g sugar
50 g oil
pinch of salt
1/2 tsp vanilla
also:
Handful of strawberries, for assembly, later.
This is a super duper easy recipe to remember. 50/50/50, haha.
If you guys don't have a scale yet, get one. For things that are really delicate, it's indispensable.
Preheat your oven to 300 degrees Fahrenheit.
Line an 8x8 pan, or a cake pan. (8 inches should be okay for that, but you'll probably have thinner layers)
Whip the egg whites until really frothy. Add in the sugar, and continue to whip until stiff peaks form.
Beat the egg yolks, whole egg, flour, oil, salt, & vanilla until totally combined.
It should be yellow, and a very very thick and odd texture. If you pick up the spoon/whisk/beater and think "what the hell is this?", then it's right.
Mix a few spoonfuls of the egg whites into that mixture, just to make it lighter and easier to fold the rest of the whites into. Trust me, any time you have to fold egg whites into a really thick batter like this, do that trick.
Fold the rest of the egg whites into it, making sure to fully incorporate them. (I made this cake once and was very lazy and I had random spots of cooked meringue in my cake because I didn't mix it well.) So just make sure it's uniform in color, with no streaking.
Bake for 25-30 minutes, or until the top is golden brown. (It's better to slightly overbake this cake than underbake it)
Let the cake cool and get started on the whipped cream.
Stabilized whipped cream:
1 1/2 cups of whipping cream
1/2 cup of sugar (you can adjust this depending on your tastes. I tend to add a bit more because I am a sugar junkie >__> )
2 1/2 Tbsp gelatin (that's generally one packet)
1 Tbsp cold water
Put the cold water in a small dish and bloom the gelatin. (sprinkle it over the water and wait until it's absorbed all of it)
Microwave it for a few seconds, until it's liquid.
Set aside to cool.
Whip the cream and sugar to stiff peaks.
If your gelatin still hasn't cooled down enough (ie, it's still steaming, like mine was), pour a bit of the cold cream into it. Works like a charm.
Pour the gelatin into the whipped cream with the mixer going, making sure to get it all incorporated, but don't whip it so much it makes butter!
Assembly:
Level your cake, and split it into two layers.
put a very thin layer of whipped cream down, then place cut, sliced, or chopped strawberries down. (this helps to keep the strawberry juice from making the cake soggy).
Cover the strawberries completely with more cream.
Put the top layer on then ice the top with cream.
You can do the sides, but I think it looks fine with just the top done :)
Let chill in the fridge for at least a half an hour, so the gelatin can set up at least a little.
Slice into cute little rectangles and garnish with strawberries :)
Monday, March 28
Japanese Strawberry Shortcake


Thursday, March 3
Chocolate, Banana & Caramel Entremet
I feel like whenever I open up the "create post" page on blogger, I have to find new words for apologies. My life really hasn't been conducive to posting, and so it's just hard to find the time/money. Also, I live in a basement apartment now, with no natural lighting (except for a tiny, high up window in my bedroom), so my photographs suffer.
I did buy a new lamp with some daylight CFL bulbs, and that greatly improved my photos!
Anyway, I finally decided that I would make something for the blog. Something pretty.
Unfortunately, my first attempt (a blood orange and pear entremet) didn't work as well as I'd hoped. It just didn't look as good as I wanted, and the cruddy lighting I had didn't help. It was sponge cake, mousse, and gelee. I wasn't a huge fan of the gelee, at least with that cake, so the next one I did was just mousse and cake.
And that brings me to what I'm going to show you guys today! A bit of warning: The following recipes are a result of some Frakensteining. But it's really really really good. Really good. REALLY. GOOD. Haha okay. If you're going to attempt it, make sure to read through the entire recipe. Certain things need to be finished in certain orders, because of the nature of the gelatin in the mousse and all of that. So even though all the recipes will come first, make sure to follow the order/timing of the assembly section :)

Chocolate, Banana, Caramel & Pecan Entremet:
(makes 1 8x8 entremet, will probably need to be trimmed)
Ingredients:
Chocolate Sponge Cake and Pecan Sponge Layer:
3 eggs, separated
1 whole egg
50 g of oil
50 g flour
50 g sugar
3 tbs cocoa powder
1 c coarsely ground pecans
dash of cinnamon
3 mousses:
1 cup heavy cream
1 Tbs sugar
1 banana
1/2 cup of chocolate
3 Tbs butter
1/2 cup of caramel
2.5 tbs gelatin (one packet)
Chocolate Ganache:
3/4 c heavy cream
1 c chocolate (this will probably make more than you need, but store it in the fridge or something XD)
Methods:
Sponge cake:
Preheat your oven to 300 degrees Fahrenheit.
Whisk the egg whites until frothy. Add the sugar, and whip to stiff peaks.
Whisk together the egg yolks, whole egg, and oil. Sift in the flour, and mix until it's well incorporated.
Mix a couple of spoonfuls of the egg whites into the yolk mixture, to make it easier to fold in. Then fold the lightened yolk mixture into the whites, carefully.
Set aside 1/4 of the mixture, and carefully fold in the pecans and the cinnamon. Spread out that mixture on a covered sheet pan, in approximately the size of the pan you're going to assemble the whole cake in. (if you have multiples of the same size, go ahead and bake it in a pan. I'm just trying to save you washing dishes XD)
Bake it until it's lightly browned on top, and set it aside.
Carefully mix the cocoa powder into the rest of the batter, and bake it in an 8x8 pan for ~15 minutes, or until it's lightly browned on top. (you can also use the toothpick test, but be careful, it might fall)
Set that aside, but wash out your pan.
Mousse:
Bloom the gelatin over 2 tbs of cold water
Whip the cream to stiff peaks (but be careful not to make butter!)
Banana:
Puree the banana, with the Tbs of sugar. Warm it up a little, and stir 1/3 of the gelatin into it, making sure it melts completely. Immediately fold into 1/3 of the whipped cream.
Chocolate:
Melt the chocolate with the butter over low heat. add in 1/3 of the gelatin, mix, and fold into 1/3 of the whipped cream
Caramel:
Melt the caramel, mix in the remaining gelatin, and fold into the remaining whipped cream.
Ganache:
Bring the heavy cream to a boil. Pour over the chocolate, and stir until completely combined. Let cool before topping the entremet.
AND FINALLY, ASSEMBLY:
Place the pecan sponge in a lined 8x8 pan.
Make the banana mousse, spread it over the sponge, and level it off with an offset spatula (greatest invention ever)
Split the chocolate sponge into two layers. Place one layer on top of the mousse, pressing down slightly.
Make the chocolate mousse, apply, and level.
Place the second layer of chocolate sponge.
Make the caramel mousse, apply, and level.
If the ganache is already room temperature, go ahead and pour a thin layer on top. If not, put the whole entremet in the freezer for a bit, and then pour the ganache on top.
Let it sit in the fridge overnight, slice, and enjoy. (because you deserved it...that was a lot of work!)
If you guys want the recipe/instructions for the caramel corkscrew & the candied pecan, just ask in the comments, and I'll put them in another post. :)
I'm sleepy now...bye! Haha :)
Monday, October 11
Blueberry Japanese Cheesecake
Ooooooh.
I love cheesecake.
It's pretty odd how much I love cheesecake, considering that I'm not a fan of cold cheese...but I guess cream cheese is in a category of its own.
Japanese cheesecake is the child of a beautiful affair between cheesecake and sponge cake, haha. It's so light and fluffy, but still manages to taste like cheesecake, and even have that same creaminess.
I tried to make it once before, but that was a flop. I don't quite remember what was wrong, but trust me...it was wrong. XD
Anyhoo, I'm not feeling too well today :( so I'm just gonna get right to the pictures and the recipe.
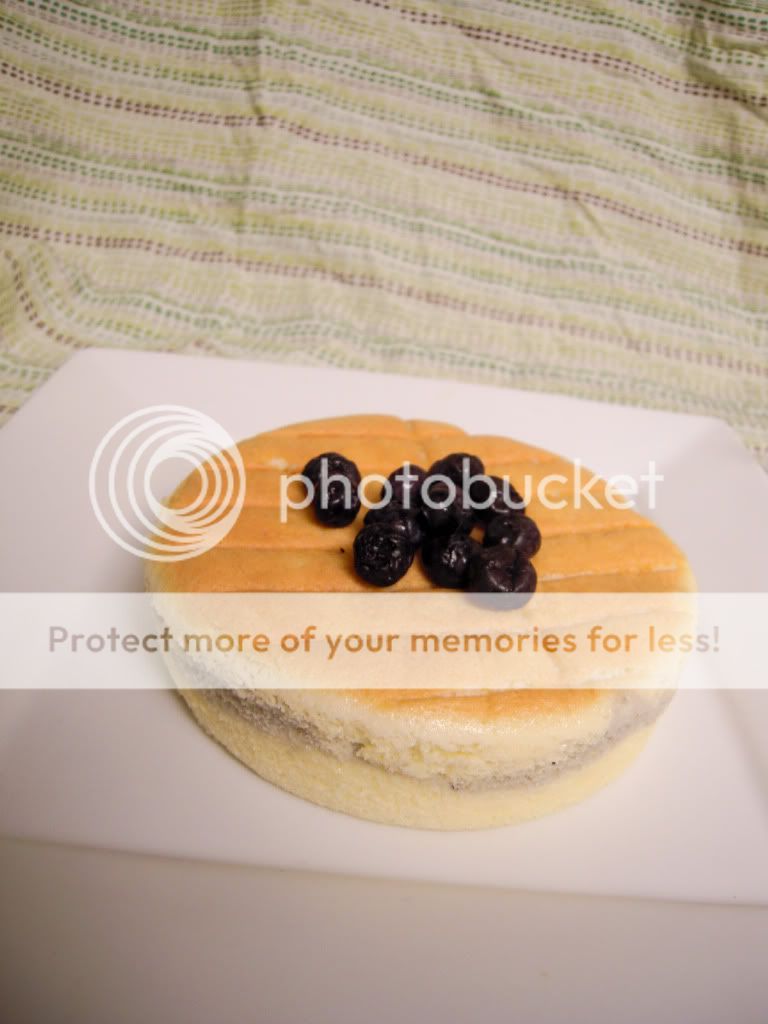

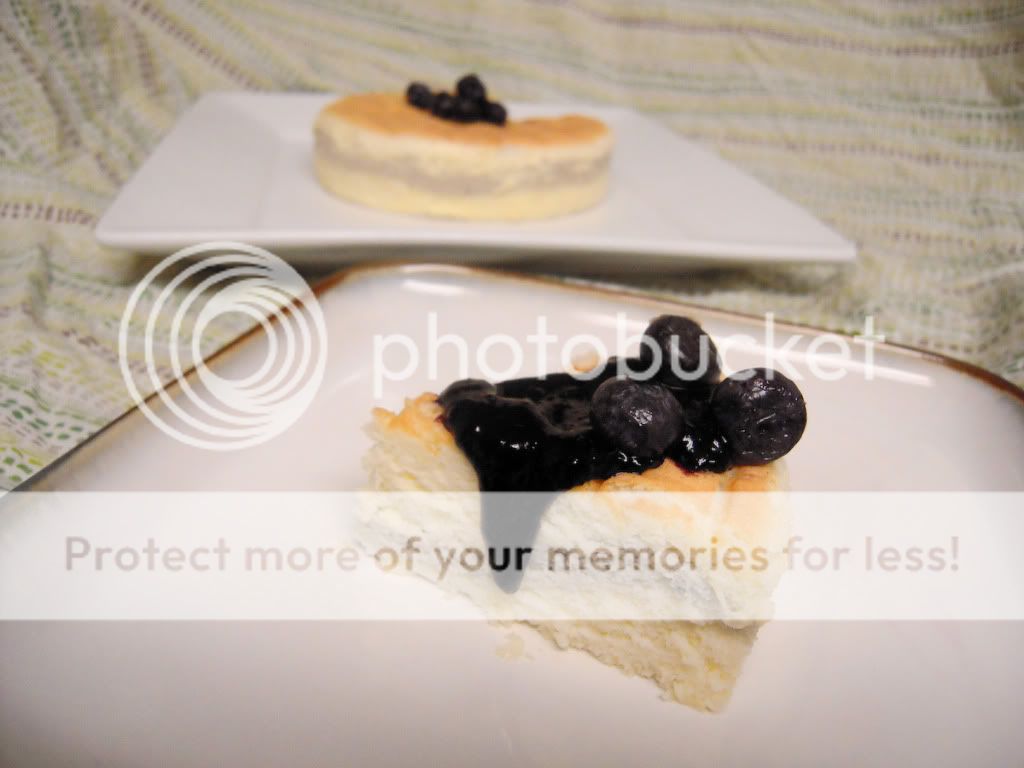
 (just to show you my tin floating in its bath, haha)
Japanese Cotton Cheesecake w/ Blueberry layering:
4 ounces of room temperature cream cheese.
1.5 tablespoons of butter
2.5 tablespoons of heavy cream
1/2 cup of granulated sugar
3 eggs, separated
1/4 teaspoon of cream of tartar
1/3 cup of flour
1 tsp baking powder
2 tablespoons of blueberry sauce (literally just cook and squish the berries over medium heat, and strain)
Place a tray in the oven, filled with an inch of water, large enough to hold your pan. (I used a 6 inch pan for this recipe). If you're using a springform pan for your cheesecake, be sure to wrap the outside in foil so the water doesn't seep in.
Melt the butter and cream cheese with the cream over medium-low heat, stirring occasionally. Stir until it's completely smooth, then set it aside to cool.
Once it's cool, whisk in the yolks.
Mix the flour and baking powder into the cream cheese mixture, being careful to not overmix it.
Depending on how much of the blueberry you want, divide the batter into 2 (i did 1/3 and 2/3), and mix the blueberry sauce into one part.
Meanwhile, whisk the egg whites with the cream of tartar until frothy. Then add the sugar, a few tablespoons at a time, while whisking the egg. Continue until the whites are medium peaks. Fold the egg white into both mixtures, and pour it into the pan. (I did half of the plain, then the blueberry, then the rest of the plain)
Carefully set the pan into the hot water bath, and bake it for 50-60 minutes. Don't open the oven until it's close to ready! When you think it's ready, the top should be a nice brown, and do the toothpick test (stick a toothpick in the middle of the cake, and if it comes out clean, you're good)
Immediately turn the cake out onto a cooling rack and let it cool for 30 minutes. Then wrap it and place it in the fridge until you're ready to serve it.
Serve with whipped cream and/or extra blueberry sauce. (I think the unsweetened juice is a really nice contrast to the sweet cake :D )
Wednesday, May 5
Coconut cupcakes with pineapple filling.
And a condensed milk glaze.
I feel like I've taken a trip to some tropical island XD
I am not a huge fan of coconut, as my parents will readily tell you, but I think that my dislike for coconut stemmed from the texture of the shredded stuff. It's so gross! But the flavor of coconut doesn't bother me, as I've learned with these cupcakes.
It's even kind of good ;D
Haha.
So anyway, this idea came from some suggestions on flour on her nose's page on Facebook. I thought Mom had some coconut milk that I could swipe, and I knew I had frozen pineapple in the fridge.
When I went to get the milk, I saw that it was coconut oil instead! Which actually worked out rather well, since we were low on butter.
So in this recipe, I swapped out the butter for coconut oil (it's in a solid state), and just used regular milk, but if you can only get the milk, just switch out regular milk for coconut milk and use butter instead of oil.
I don't know what happened, but the filling wouldn't thicken! So I got the harebrained idea of trying to turn it into pineapple rice pudding, but then I think the starch from the rice helped thicken it too much before the rice got to cook! I had to push it through a sieve to get all the uncooked rice out XD
I'll say exactly what I did, though, so you can at least get the same results.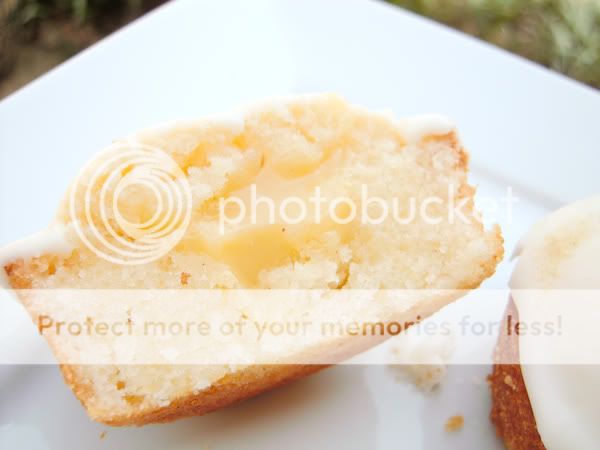


Coconut cupcakes with pineapple filling and condensed milk glaze (whew):
Coconut cupcakes: (makes 6)
1 c flour
2 tbsp corn starch
pinch of salt
3/4 tsp baking powder
4 tbsp coconut oil (or soft butter, if you're going to use coconut milk)
1/2 cup sugar
1 egg
tiny bit of vanilla
1/4 cup of milk (or coconut milk, if you're using butter)
Preheat the oven to 400 degrees Fahrenheit.
Mix together the flour, corn starch, baking powder, and salt. Beat in the coconut oil/butter until it makes a kind of thick paste. Beat in the sugar.
Beat in the egg until fully combined. Add the vanilla and milk.
Put the batter in lined cupcake tins, and bake for about 20 minutes. (do the toothpick test!)
Pineapple filling:
1 egg
2 yolks
1/3 c pineapple puree (strained)
2 tbsp lemon juice
4 tbsp butter
1 cup sugar
3/4 cup milk
1/2 tsp ginger
1/2 tsp cinnamon
(maybe a bit of cornstarch)
(and randomly, a cup of rice, haha)
Put a stainless steel bowl over a simmering pot of water, or use a double boiler. Whisk together the egg and the yolks, then add everything else but the rice. Mix it over med-low heat until it's thick. If it doesn't thicken, add a little cornstarch and keep mixing. If that still doesn't work, go ahead and add the rice and let it get nice and thick. Once it's thick, push the filling through a sieve to get rid of all the rice. Let it cool.
To fill the cupcakes, take a sharp knife and cut a cone out of the top of the cupcake. Cut off the pointy bit of the cone, just leaving a small cover. Fill the cupcake with the pineapple filling, and place the "lid" over the filling.
Then mix some condensed milk with powdered sugar (as if it wasn't sweet enough ;)) until it's really thick, but still spreadable.
Frost/glaze the cupcakes and enjoy!

Thursday, February 18
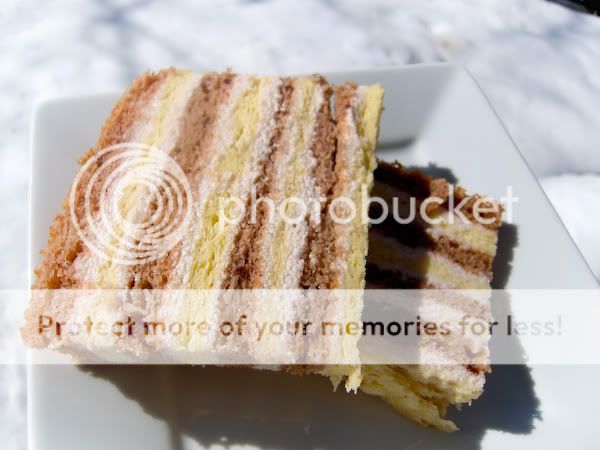
Chocolate & Vanilla Sponge Cake with Strawberry Buttercream
Yet another mouthful, ha.
After a string of unsuccessful submissions to foodgawker and tastespotting, I wanted to make something that was visually stunning. (and not impossible to execute, haha) Stumbling through the food blogosphere (oh how I hate that term, haha), I came upon this cake.
I made some changes, and had to improvise (as English isn't the blogger's native language, and some things weren't entirely clear)
Anyway, it's really pretty, but there's too much frosting between the layers for me, so I'd either put less in between each (which would make the frosting less visible :( ), or make the layers thicker and just have 4 instead of 8 (which is also less pretty). But if you're a big frosting fan (and it IS good), then just go ahead and use as much as you want.
I definitely think one of the keys to the beauty of the cake is the clean lines, so definitely try to bake the layers evenly, and to trim the sides of the cake.


Sponge cake recipe:
Adapted from Cafe Chocolada
6 eggs, separated.
1 cup sugar
3/4 cup oil
3/4 cup milk
1 cup flour
4 tsp baking powder
1 tsp vanilla
2 tsp cocoa powder
Preheat oven to 395 degrees Fahrenheit (Yup!)
Line a pan or two (I only had one -___-)with parchment paper, and lightly spray with nonstick spray. I used a half sheet pan (so I could just cut the one layer into 4 pieces), but you can use any sort of pan you want, and just split the layers in half.
Beat the eggs whites until stiff. While that's happening, whisk together the yolks and the sugar, until thick and lighter in color. Whisk the yolks into the whites.
Then add in the oil, vanilla, milk, flour, and baking powder and mix until totally combined (the oil is tough, but whisking helps instead of just using a spoon or spatula).
Put half of the batter (don't freak out if it's all bubbly and rising) into the pan, making sure to level it really well. While that's baking (for about 10-15 minutes), put 2 tsps of cocoa powder into the remaining batter. Make sure there's no clumps or it's really hard to incorporate.
Bake that cake.
Once the cakes cool, peel off the parchment paper and cut them in whatever desired shape. I wrapped them up and stuck them in the freezer while I made the frosting.
Strawberry Buttercream Frosting: (not my swiss stuff! haha)
1 cup milk
1/4 c flour
1/4 c sugar
1/3 c strawberry puree (I used the juice from some frozen strawberries)
1 stick of unsalted butter, softened.
Combine 1/2 cup of the milk with the flour, and heat slightly over medium heat, whisking. When it starts to thicken a little, take it off the heat. Bring the rest of the milk to a boil, with the sugar and the strawberry puree. Turn the heat to medium-low, and add in the flour/milk mixture. Whisk it continuously, cooking it until it's thick.
Take it off the heat and let it cook completely.
Then, beat in the butter.
My cake assembly:
I cut each cake into 4 equal pieces and stuck them in the freezer while I made the frosting. After layering the cake + frosting, I set the cake in the fridge overnight, and then trimmed off the edges to make a nice rectangle.
Bring it to room temperature before serving. :)
Tuesday, November 3
Mini Pumpkin Cheesecakes
About a year ago, I asked my father to buy me a couple cans of pumpkin.
He bought at least 10. (Overkill much, Dad?)
Here is my latest attempt to defeat The Pumpkin Menace.
These mini cheesecakes are awesome because they taste like pumpkin pie, but better, they're cheesecake without all the fuss (water bath and such), and they're easy to share.
I was going to make the crust with gingersnaps, but I didn't have any. And I'm broke :P
So I was going to settle for graham crackers. But I don't have any.
And then I eyed the giant bag of sugar cookies I made over the weekend. Success! However, that would be a pretty boring crust. So, I got the bright idea of chopping up some candied ginger, and adding in the spices that I would normally put into gingersnaps. I'm going to write up what I used, but you're welcome to use gingersnaps, graham crackers, Oreos, or anything you want :)
I took these over to a friend's place for a movie-party. (V for Vendetta, midnight on the 5th XD )
"You're going to be the death of me," moaned Ian as he unwrapped his third (possibly fourth) cheesecake. I'm going to take that as a ringing endorsement, and warn you to keep them away from your loved ones...as they'll probably ignore you in favor of these creamy treats ;)


melted whipped cream XD
Mini Pumpkin Cheesecakes:
(makes 1 dozen)
Crust:
1 cup cookie crumbs
1 tsp finely diced candied ginger (or real ginger)
2 tbsp of any combination of the following spices:
cinnamon, nutmeg, ginger, allspice
a pinch of pepper (oh yeah, good stuff)
2 tbsp melted butter
2 tbsp sugar
Preheat oven to 325 degrees Fahrenheit
Line a muffin tin with paper liners.
Mix everything together.
Press about a tablespoon of the mixture into the tin.
Bake the crusts for about 8-10 minutes.
Let cool while preparing the filling.
Lower the oven temperature to 300 degrees.
Filling:
8oz room temperature cream cheese
2 eggs
2/3 cup of pumpkin. (you can go up to 3/4 of a cup if you like your pumpkin more intense...or even a full cup! It makes the cakes a liiiittle denser, but not enough to be detrimental)
1 tsp vanilla
2 tbsp of the following spices, all together:
cinnamon, nutmeg, allspice, ginger. (omit some, add others, or just use pumpkin pie spice...it's up to you :) ) (oh and you can cut the amount if that's too much for you, hehe)
1/2 cup of sugar (white sugar, or brown sugar)
2 tbsp of molasses or dark corn syrup IF you used white sugar.
Cream the cream cheese and sugar together.
Add in one egg at a time, waiting until each egg is fully incorporated.
Add in vanilla (and molasses or corn syrup) and beat.
Then add in the pumpkin and the spices.
Spoon about 1-2 tbsp of the mixture onto each crust. Well, actually just add a little to each crust until you've used it all up.
Bake for 25-30 minutes. Let cool, then chill in the fridge for at least a few hours.
Enjoy!
Saturday, August 29
Daring Bakers - Dobos Torte
Heyoooo, it's that time of the month again...(albeit a little late)....Daring bakers!
The August 2009 Daring Bakers' challenge was hosted by Angela of A Spoonful
of Sugar and Lorraine of Not Quite Nigella. They chose the spectacular Dobos
Torte based on a recipe from Rick Rodgers' cookbook Kaffeehaus: Exquisite
Desserts from the Classic Caffés of Vienna, Budapest, and Prague.
So basically the Dobos Torte is a sponge layer cake, layered with buttercream, and topped with caramel-coated pieces of cake.
The torte itself was really easy, but man...that caramel piece gave me sooo much trouble.
Yolks and sugar
Lightened
Folding

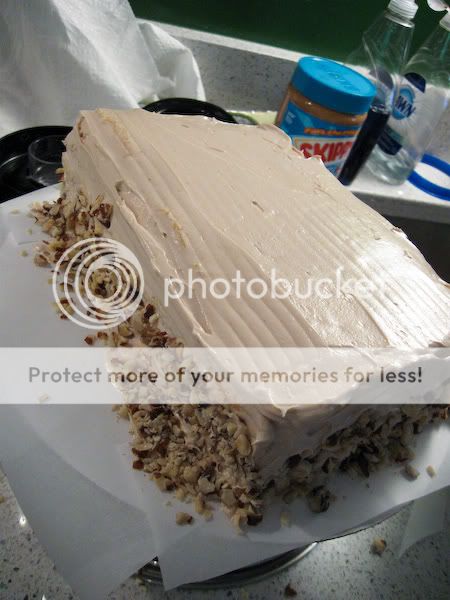

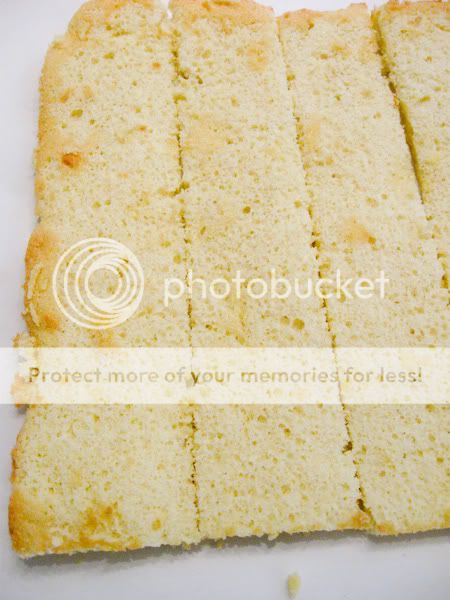


Onto the recipe!
Dobos Torte:
Sponge layers:
6 large eggs, separated
1 1/3 cups of powdered/confectioner's/icing sugar
1 tsp vanilla
1 cup of flour
Pinch of salt
Preheat oven to 400 degrees Fahrenheit
Either do a lot of work and line 6 round pans with parchment paper, or do what I did, and line a half-sheet pan with parchment paper. XD
Beat the egg yolks and 2/3 of a cup of the sugar until it's thick and lighter in color.
In another bowl, whip the egg whites until soft peaks form. Beat in the rest of the sugar and beat until stiff, shiny peaks form.
Fold the egg whites into the yolks.
Slowly fold in the flour and salt.
Spread a thin thin thin layer of the batter into the pan. Make sure it's even on top. (you can put another layer of parchment paper on top and press a similar pan over that...if you get what I'm saying...to even it out XD)
Then bake for about 5-10 minutes, or until the cake is slightly browned on the edges.
Slice and/or halve as you please. (it depends on what shape/size/how many layers you want)
Buttercream:
I know you all know this recipe by heart now, right? :P
Caramel :
1 cup of granulated /caster/superfine sugar
12 tbsp water
8 tsp lemon juice
1 tablespoon of NEUTRAL oil.
Reserve one of the cake layers
Copypasta recipe!
"1.Choose the best-looking cake layer for the caramel top.
To make the caramel topping: Line a jellyroll pan with parchment paper and butter the paper.
Place the reserved cake layer on the paper. Score the cake into 12 equal wedges. Lightly oil a thin, sharp knife and an offset metal spatula. 2.Stir the sugar, water and lemon juice in a small saucepan.
Bring to a boil over a medium heat, stirring often to dissolve the sugar.
Once dissolved into a smooth syrup, turn the heat up to high and boil without stirring, swirling the pan by the handle occasionally and washing down any sugar crystals on the sides of the pan with a wet brush until the syrup has turned into an amber-coloured caramel. 3.The top layer is perhaps the hardest part of the whole cake so make sure you have a oiled, hot offset spatula ready.
I also find it helps if the cake layer hasn't just been taken out of the refrigerator.
I made mine ahead of time and the cake layer was cold and the toffee set very, very quickly—too quickly for me to spread it. Immediately pour all of the hot caramel over the cake layer. You will have some leftover most probably but more is better than less and you can always make nice toffee pattern using the extra to decorate. Using the offset spatula, quickly spread the caramel evenly to the edge of the cake layer. Let cool until beginning to set, about 30 seconds. Using the tip of the hot oiled knife (keep re-oiling this with a pastry brush between cutting), cut through the scored marks to divide the caramel layer into 12 equal wedges. Cool another minute or so, then use the edge of the knife to completely cut and separate the wedges using one firm slice movement (rather than rocking back and forth which may produce toffee strands). Cool completely."
Assembly is simple.
Cake layer, buttercream, rinse, repeat.
Then top with the caramel in whatever fashion you choose.
I sprinkled ground hazelnuts on each layer, and pressed chopped nuts around the base of the cake.
Refrigerate the cake, but let it come to about room temperature before cutting.
Saturday, July 18
ICE:Pear & Sage Cupcakes with Honey Ginger Buttercream
Recipe number 3 :P
DON'T FORGET TO VOTE FOR ME ON THE 28TH OF JULY HERE: http://www.ironcupcakemilwaukee.com/, in the right hand column. Tell your friends to vote, too!
Etsy prize-pack:
A sweet cupcake ID bracelet by INSANEJELLYFISH
A delicious treat from CIRCLEMONKEY
a sweet surprise from Sweet Cuppin' Cakes Cupcakery
CAKESPY,who is now going to be doing a piece for the winner each month until further notice
Corporate prizes:
HEAD CHEFS by FIESTA PRODUCTS
HELLO CUPCAKE by Karen Tack and Alan Richardson
JESSIE STEELE APRONS
TASTE OF HOME books
a t-shirt from UPWITHCUPCAKES.COM
Iron Cupcake:Earth is sponsored in part by 1-800-Flowers


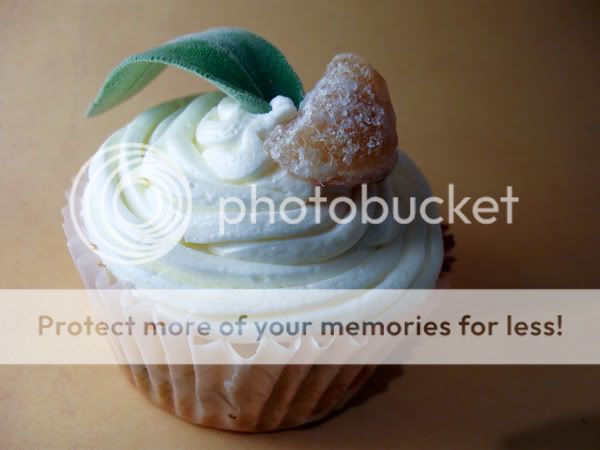
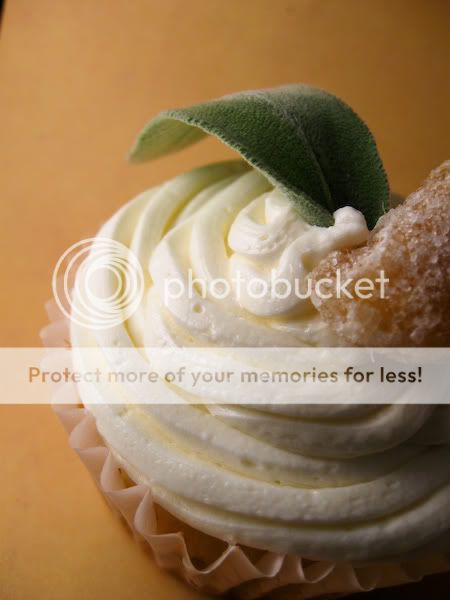
Pear Sage cupcakes:
3 1/4 cups of flour
1 1/4 cups of sugar
1 tbsp baking powder
1/2 tsp salt
1/4 tsp baking soda
1/4 cup + 6 tbps canola oil
2 eggs
1 tsp vanilla
1 cup of sour cream
1 cup of milk (I did 1/2 cup of milk, and 1/2 cup of heavy cream)
1 cup of sliced pear
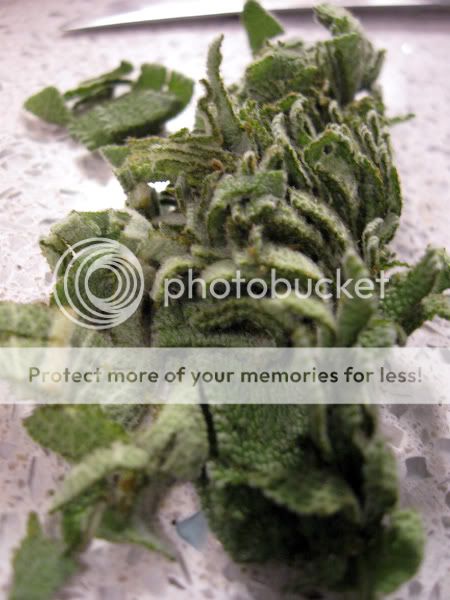
1/2 cup of chopped sage.
Preheat oven to 350 degrees Fahrenheit.
As per my usual methods, mix everything together. I am the queen of lazy baking. :P
If you insist, you can mix the dry stuff together, and mix the wet stuff together, THEN mix those together. ;)
Drop a spoonful of batter into the cupcake tins. Then place a layer of sliced pear, then more batter, then pear, then batter.
Bake for about 18 minutes or until it passes the crumb test.
Honey ginger buttercream:
Directions here
But add 1/4 cup of honey and either diced/mashed fresh ginger, or diced candied ginger.
ICE: Strawberry & Basil Cupcakes with Balsamic frosting
You've already read the whole Iron Cupcake: Earth spiel from the other post, so it's just sponsors, pictures, and recipe this time. :P
DON'T FORGET TO VOTE FOR ME ON THE 28TH OF JULY HERE: http://www.ironcupcakemilwaukee.com/, in the right hand column. Tell your friends to vote, too!
Etsy prize-pack:
A sweet cupcake ID bracelet by INSANEJELLYFISH
A delicious treat from CIRCLEMONKEY
a sweet surprise from Sweet Cuppin' Cakes Cupcakery
CAKESPY,who is now going to be doing a piece for the winner each month until further notice
Corporate prizes:
HEAD CHEFS by FIESTA PRODUCTS
HELLO CUPCAKE by Karen Tack and Alan Richardson
JESSIE STEELE APRONS
TASTE OF HOME books
a t-shirt from UPWITHCUPCAKES.COM
Iron Cupcake:Earth is sponsored in part by 1-800-Flowers


Strawberry basil cupcakes:
3 1/4 cups of flour
1 1/4 cups of sugar
1 tbsp baking powder
1/2 tsp salt
1/4 tsp baking soda
1/4 cup + 6 tbps canola oil
2 eggs
1 tsp vanilla
1 cup of sour cream
1 cup of milk (I did 1/2 cup of milk, and 1/2 cup of heavy cream)
1 cup of chopped or sliced strawberries
1/2 cup of chopped basil.
Preheat oven to 350 degrees Fahrenheit.
As per my usual methods, mix everything together. I am the queen of lazy baking. :P
If you insist, you can mix the dry stuff together, and mix the wet stuff together, THEN mix those together. ;)
Thennnn fold in the strawberries.
Fill up the cupcake tins 3/4 of the way, and bake for about 18ish minutes. (crumb test, crumb test!)
Balsamic buttercream:
Directions here
But replace the chocolate with ~1/4 cup of balsamic vinegar.
Wednesday, July 15
ICE: Lavender & Mint Cupcakes
This is my first Iron Cupcakes: Earth challenge! Wooh!
Imagine my surprise when I checked the site and saw that the theme was HERBS.
"Holy moly, how'm I gonna pull this one off?" (oh yes, that's how I talk.)
After MUCH thought, I decided on a lavender cupcake with mint buttercream.
It took a lot of searching to find reasonably priced culinary lavender (which I got here, by the way), but once I did, it was ON. (like Donkey Kong. Ha)
HEY. BEFORE YOU GET TOO COMFORTABLE, DON'T FORGET TO VOTE FOR ME ON THE 28TH OF JULY HERE: http://www.ironcupcakemilwaukee.com/, in the right hand column. Tell your friends to vote, too! Oh, and vote for my other two entries, Strawberry Basil and Pear Sage! :)
Now let's take a break for station identification. I mean, now here's a word from our sponsors.
I mean...
Haha, here are the prizes that the top cupcake will win this month:
Etsy prize-pack:
A sweet cupcake ID bracelet by INSANEJELLYFISH
A delicious treat from CIRCLEMONKEY
a sweet surprise from Sweet Cuppin' Cakes Cupcakery
CAKESPY,who is now going to be doing a piece for the winner each month until further notice
Corporate prizes:
HEAD CHEFS by FIESTA PRODUCTS
HELLO CUPCAKE by Karen Tack and Alan Richardson
JESSIE STEELE APRONS
TASTE OF HOME books
a t-shirt from UPWITHCUPCAKES.COM
Iron Cupcake:Earth is sponsored in part by 1-800-Flowers
Whew. Now on to the fun stuff.
Dried lavender
Lavender syrup
The lavender's like sprinkles!
Lavender cupcakes with Mint swiss buttercream:
2 Cups of sugar
2 1/2 Cups of flour
2 tsps of baking soda
1 tsp of baking powder
1 tsp of salt
2 eggs
1 cup of sour cream
1/2 cup of vegetable/canola oil
1/2 cup of lavender syrup (recipe to follow)
1/2 cup of water
Preheat oven to 350 degrees Fahrenheit
Combine and mix. Hehe. My favorite cake recipes require very little direction.
Fill tin 3/4 of the way with batter.
Cook until they pass the FABLED CRUMB TEST.
Let cool for 10 minutes, then remove from tin and let cook on wire racks.
Lavender syrup:
2 cups of water
2 cups of sugar
3 tablespoons of dried culinary lavender
BOIL IT ALL. BOIL IT. For about 10 minutes.
Then, pour it all into a container and let sit in the fridge overnight.
Strain out the lavender and store in a bottle/jar/whatever in the fridge.
Mint buttercream:
Directions here
Replace the chocolate with mint syrup (made the same way as the lavender kind) or mint extract.
Easy peasy lemon squeezy. :)


