


I feel like whenever I open up the "create post" page on blogger, I have to find new words for apologies. My life really hasn't been conducive to posting, and so it's just hard to find the time/money. Also, I live in a basement apartment now, with no natural lighting (except for a tiny, high up window in my bedroom), so my photographs suffer.
I did buy a new lamp with some daylight CFL bulbs, and that greatly improved my photos!
Anyway, I finally decided that I would make something for the blog. Something pretty.
Unfortunately, my first attempt (a blood orange and pear entremet) didn't work as well as I'd hoped. It just didn't look as good as I wanted, and the cruddy lighting I had didn't help. It was sponge cake, mousse, and gelee. I wasn't a huge fan of the gelee, at least with that cake, so the next one I did was just mousse and cake.
And that brings me to what I'm going to show you guys today! A bit of warning: The following recipes are a result of some Frakensteining. But it's really really really good. Really good. REALLY. GOOD. Haha okay. If you're going to attempt it, make sure to read through the entire recipe. Certain things need to be finished in certain orders, because of the nature of the gelatin in the mousse and all of that. So even though all the recipes will come first, make sure to follow the order/timing of the assembly section :)

Chocolate, Banana, Caramel & Pecan Entremet:
(makes 1 8x8 entremet, will probably need to be trimmed)
Ingredients:
Chocolate Sponge Cake and Pecan Sponge Layer:
3 eggs, separated
1 whole egg
50 g of oil
50 g flour
50 g sugar
3 tbs cocoa powder
1 c coarsely ground pecans
dash of cinnamon
3 mousses:
1 cup heavy cream
1 Tbs sugar
1 banana
1/2 cup of chocolate
3 Tbs butter
1/2 cup of caramel
2.5 tbs gelatin (one packet)
Chocolate Ganache:
3/4 c heavy cream
1 c chocolate (this will probably make more than you need, but store it in the fridge or something XD)
Methods:
Sponge cake:
Preheat your oven to 300 degrees Fahrenheit.
Whisk the egg whites until frothy. Add the sugar, and whip to stiff peaks.
Whisk together the egg yolks, whole egg, and oil. Sift in the flour, and mix until it's well incorporated.
Mix a couple of spoonfuls of the egg whites into the yolk mixture, to make it easier to fold in. Then fold the lightened yolk mixture into the whites, carefully.
Set aside 1/4 of the mixture, and carefully fold in the pecans and the cinnamon. Spread out that mixture on a covered sheet pan, in approximately the size of the pan you're going to assemble the whole cake in. (if you have multiples of the same size, go ahead and bake it in a pan. I'm just trying to save you washing dishes XD)
Bake it until it's lightly browned on top, and set it aside.
Carefully mix the cocoa powder into the rest of the batter, and bake it in an 8x8 pan for ~15 minutes, or until it's lightly browned on top. (you can also use the toothpick test, but be careful, it might fall)
Set that aside, but wash out your pan.
Mousse:
Bloom the gelatin over 2 tbs of cold water
Whip the cream to stiff peaks (but be careful not to make butter!)
Banana:
Puree the banana, with the Tbs of sugar. Warm it up a little, and stir 1/3 of the gelatin into it, making sure it melts completely. Immediately fold into 1/3 of the whipped cream.
Chocolate:
Melt the chocolate with the butter over low heat. add in 1/3 of the gelatin, mix, and fold into 1/3 of the whipped cream
Caramel:
Melt the caramel, mix in the remaining gelatin, and fold into the remaining whipped cream.
Ganache:
Bring the heavy cream to a boil. Pour over the chocolate, and stir until completely combined. Let cool before topping the entremet.
AND FINALLY, ASSEMBLY:
Place the pecan sponge in a lined 8x8 pan.
Make the banana mousse, spread it over the sponge, and level it off with an offset spatula (greatest invention ever)
Split the chocolate sponge into two layers. Place one layer on top of the mousse, pressing down slightly.
Make the chocolate mousse, apply, and level.
Place the second layer of chocolate sponge.
Make the caramel mousse, apply, and level.
If the ganache is already room temperature, go ahead and pour a thin layer on top. If not, put the whole entremet in the freezer for a bit, and then pour the ganache on top.
Let it sit in the fridge overnight, slice, and enjoy. (because you deserved it...that was a lot of work!)
If you guys want the recipe/instructions for the caramel corkscrew & the candied pecan, just ask in the comments, and I'll put them in another post. :)
I'm sleepy now...bye! Haha :)
Thursday, March 3
Chocolate, Banana & Caramel Entremet


Saturday, January 1
Chocolate-Dipped Peppermint Meringues
So I'm back, sort of.
I got the urge to bake yesterday, and since meringues are so simple, I figured I'd made some more. :)
Not much of a story this time, I'm a bit under the weather, but I'm going to be making dinner tomorrow consisting of DUCK, duck fat fried potatoes, and an apple pie...so stay tuned for an in depth post on those, probably Monday. :)

Chocolate-Dipped Peppermint Meringues:
4 egg whites
1 cup of granulated sugar
1 tsp of cream of tartar (or lemon juice, if you prefer)
1 finely crushed candy cane
1 cup of melted chocolate (for much much later :) )
Preheat oven to 200 degrees Fahrenheit
Please please please do not whip these by hand, unless you have the arm strength of a thousand men.
Whip the egg whites and cream of tartar together until soft peaks form.
Add in the sugar, a few tablespoons at a time, with the mixer going until it's all incorporated. Whip until stiff peaks form. (dip the whisk in the whites, and the whites on it should stand straight up when you hold it up )
Mix in the candy cane powder, and put the meringue in a piping bag.
Line a cookie sheet with parchment paper, and pipe the meringues out in whatever shape/size you want.
Bake them for 2 hours
If you don't have as much time, or a short attention span, make them on the small side, and bake them for less time,but be certain to check them after an hour. (take one out, and let it cool for a bit on the counter, then check the doneness by snapping it in half)
(mine are fairly large, and browned because I spaced out while they were in the oven XD )
After letting them cool for a few minutes, dip the bottoms in chocolate, and set them back on the parchment paper until the chocolate sets up.
Enjoy! (and hide them from your relatives :3 )
Friday, June 18
Lollipops and Caramels!
Oh my gosh. I'm sorry.
It's been a crazy month, and life will continue to be crazy until August.
I've been working, going to Richmond, and trying to get everything together for my etsy shop.
Speaking of which, I do have a single listing up there...for some lollipops. :) So check it out! In August, I'll start the cookies and other various candies.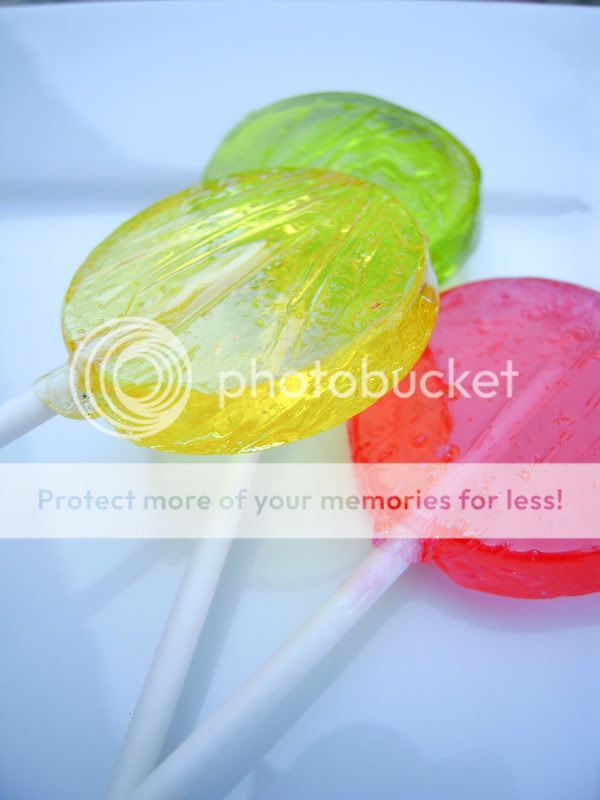

And speaking of those various candies...how about some caramels that I had to make for my family reunion? You guys remember those salted caramels I made a while ago, right?
Well, I just took that recipe, and poured it over chopped pecans. Delicious! And then I dipped some in chocolate.


Here's the recipe again: Caramel!
To make them like I did this time, chop up enough nuts (whatever kind you want, they all taste good with it) to cover the bottom of your pan. Then pour the caramel over the nuts. When you cut the caramel, the nuts help them keep their square shape, because they're so soft and squishy. Stick them in either the fridge or the freezer and dip them in melted chocolate. If it's really really hot and humid where you live, you should stick them in the fridge to set up. (it was way too hot in my house, and they stayed melted for a looooooong time)
:)
Saturday, May 8
Chocolate Covered Strawberries...for Mother's Day
Because I once made chocolate covered strawberries for the mothers in my life, my father has roped me into doing it again.
Pretty simple stuff, but I figured I'd share what I was doing.
I used about a bag of Ghirardelli milk chocolate chips and made about 25 strawberries.
Just melt the chocolate, dip the strawberries, and decorate them if you want.
You can dip them in nuts, crushed cookies, sprinkles, or whatever!
I was going to drizzle colored white chocolate over them, but we didn't have any, so I made some royal icing and used that instead. :) Oh and I dusted them with gold pearl dust. Pretty! :)
The key to this is just using good chocolate (and good strawberries), and as far as supermarket stuff goes, Ghirardelli is boss. XD
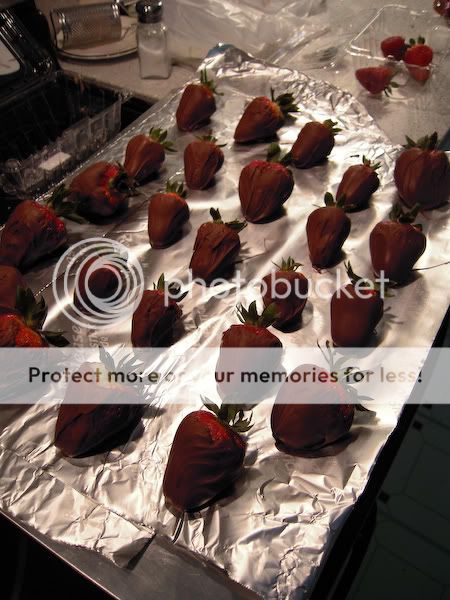
So before I go to work, here are some pictures and stuff :P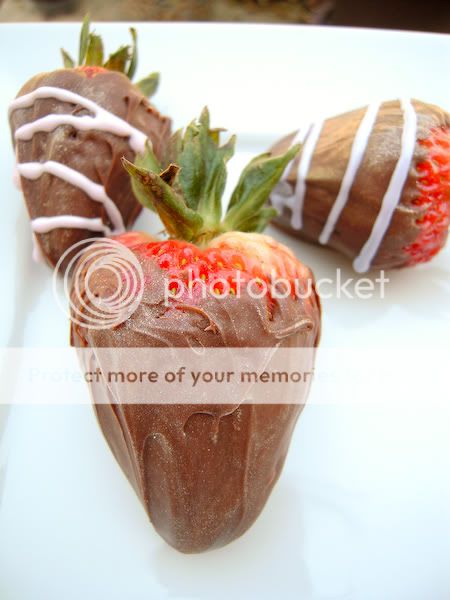
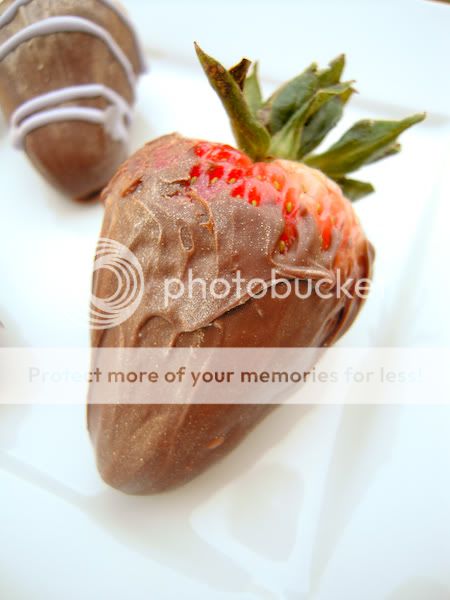
Chocolate covered strawberries:
1 bag of chocolate chips. (what, like...3 cups, maybe?)
25 strawberries (depends on size, I had a few giant ones, so you could probably do 30-35)
melt the chocolate over a double boiler, or in a microwave, making sure to stir it so it doesn't burn.
Dip the strawberries in the chocolate, and let them set on some nonstick foil or parchment paper. Either serve once set, or store covered in the fridge...but not keep them for too long, they get all goopy inside after a couple days XD
Enjoy! :)
Thursday, February 18
Chocolate & Vanilla Sponge Cake with Strawberry Buttercream
Yet another mouthful, ha.
After a string of unsuccessful submissions to foodgawker and tastespotting, I wanted to make something that was visually stunning. (and not impossible to execute, haha) Stumbling through the food blogosphere (oh how I hate that term, haha), I came upon this cake.
I made some changes, and had to improvise (as English isn't the blogger's native language, and some things weren't entirely clear)
Anyway, it's really pretty, but there's too much frosting between the layers for me, so I'd either put less in between each (which would make the frosting less visible :( ), or make the layers thicker and just have 4 instead of 8 (which is also less pretty). But if you're a big frosting fan (and it IS good), then just go ahead and use as much as you want.
I definitely think one of the keys to the beauty of the cake is the clean lines, so definitely try to bake the layers evenly, and to trim the sides of the cake.
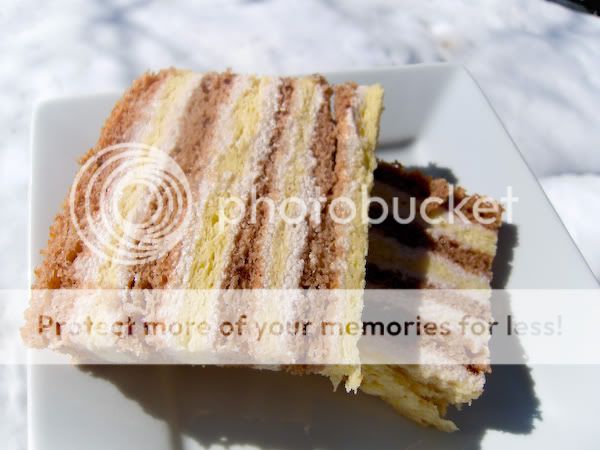


Sponge cake recipe:
Adapted from Cafe Chocolada
6 eggs, separated.
1 cup sugar
3/4 cup oil
3/4 cup milk
1 cup flour
4 tsp baking powder
1 tsp vanilla
2 tsp cocoa powder
Preheat oven to 395 degrees Fahrenheit (Yup!)
Line a pan or two (I only had one -___-)with parchment paper, and lightly spray with nonstick spray. I used a half sheet pan (so I could just cut the one layer into 4 pieces), but you can use any sort of pan you want, and just split the layers in half.
Beat the eggs whites until stiff. While that's happening, whisk together the yolks and the sugar, until thick and lighter in color. Whisk the yolks into the whites.
Then add in the oil, vanilla, milk, flour, and baking powder and mix until totally combined (the oil is tough, but whisking helps instead of just using a spoon or spatula).
Put half of the batter (don't freak out if it's all bubbly and rising) into the pan, making sure to level it really well. While that's baking (for about 10-15 minutes), put 2 tsps of cocoa powder into the remaining batter. Make sure there's no clumps or it's really hard to incorporate.
Bake that cake.
Once the cakes cool, peel off the parchment paper and cut them in whatever desired shape. I wrapped them up and stuck them in the freezer while I made the frosting.
Strawberry Buttercream Frosting: (not my swiss stuff! haha)
1 cup milk
1/4 c flour
1/4 c sugar
1/3 c strawberry puree (I used the juice from some frozen strawberries)
1 stick of unsalted butter, softened.
Combine 1/2 cup of the milk with the flour, and heat slightly over medium heat, whisking. When it starts to thicken a little, take it off the heat. Bring the rest of the milk to a boil, with the sugar and the strawberry puree. Turn the heat to medium-low, and add in the flour/milk mixture. Whisk it continuously, cooking it until it's thick.
Take it off the heat and let it cook completely.
Then, beat in the butter.
My cake assembly:
I cut each cake into 4 equal pieces and stuck them in the freezer while I made the frosting. After layering the cake + frosting, I set the cake in the fridge overnight, and then trimmed off the edges to make a nice rectangle.
Bring it to room temperature before serving. :)
Wednesday, September 9
Cookies and bad news
Like I mentioned in my last post, I went home last weekend so I could buy my new camera.
I did. (yay me)
So when I got back, I decided to make cookies, so I could share something with you guys...I know you've been feeling incredibly neglected, and I apologize XD
So I made the cookies, and I started to photograph them. I don't have a nice set up here like I do at my house, so I just decide to hold the plate of cookies up to the light and take the pictures like that.
Well, in my old age (lol), clumsiness has overcome me.
The plate slipped out of my hand, and crashed to the floor. It broke. Unfortunate, but just a plate.
HOWEVER
So did my BRAND NEW CAMERA.
The lens was fully extended, and that's exactly what it landed on.
D:
Luckily, my dad shelled out the 80 bucks for the extended warranty.
Also luckily, my roommate's boyfriend was going back home that day, and so he's supposed to drop it off to my dad who can go get it fixed. (I got it at Penn Camera and there aren't any down here D:)
:sigh:
I can't believe I managed to do that!
Anyway, I made these GIANT (on accident) oreo-like cookies.
They're pretty awesome, but I'd suggest making them a lot smaller. XD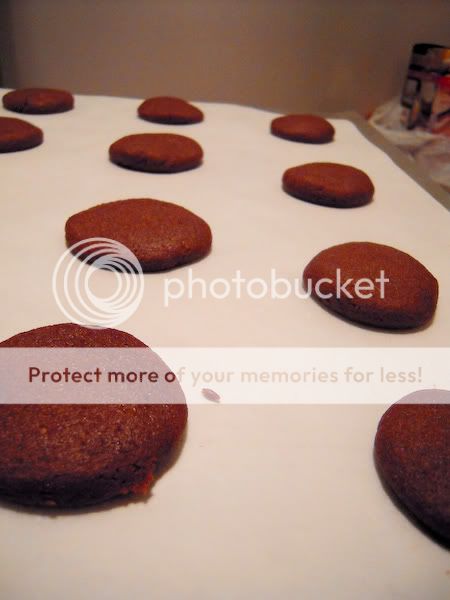
DON'T MAKE YOURS THIS BIG.
This is how huge they get. Ooh man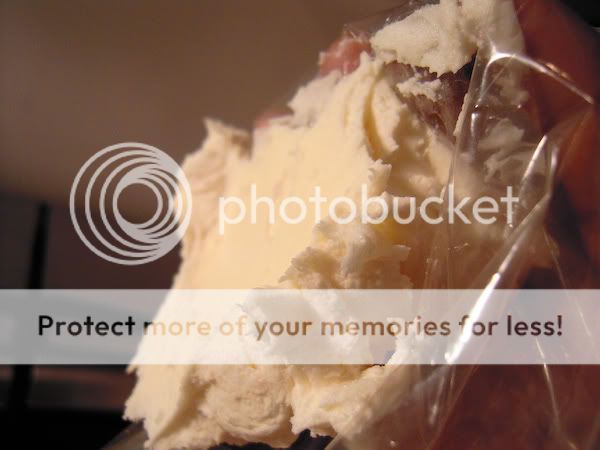
Creaaaaam
Step one!
Step two!
Sandwich!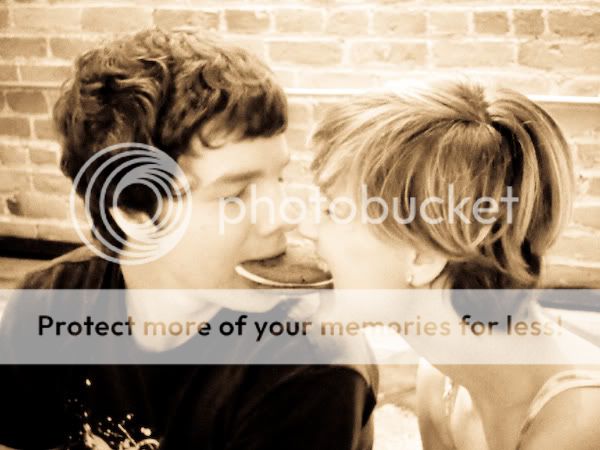
Sean and Moria sharing a cookie (after which, Moria looks at me and asks if she can eat it XD )
I have a history of taking pictures of Sean eating
The last picture I took before I broke this plate and my camera XD
Giant sandwich cookies:
cookie:
1 1/4 cups of flour
1/2 cups of cocoa powder
10 tbsp of unsalted butter, a little soft, but not room temperature
1 cup of sugar
1 tsp of baking soda
1/2 tsp baking powder
1 egg
dash of salt
Preheat the oven to 375 degrees Fahrenheit
Cream together the butter and sugar. Add the egg, and mix until fully incorporated
Add in all the dry stuff. Be careful, and go on a slow speed XD
Make balls of dough (smalllllllllll, unless you want my crazy monster cookies) and place them on a lined or greased tray. Flatten them slightly. Space them out 'cause they spread during baking.
Bake for about 9 minutes
While they're baking...make the cream!
Cream filling:
4 tbsp slightly softened unsalted butter
4 tbsp shortening
2 cups of powdered sugar
2 tsp of vanilla
Slowly beat everything. Once the sugar's all in, turn up the speed and beat until the filling's fluffed up a bit.
Put it in a piping bag or a sandwich bag with a corner cut off.
Once the cookies are cooled, assemble the sandwiches.
ENJOY.
And if they're huge...share it with someone. XD
Saturday, August 29
Daring Bakers - Dobos Torte
Heyoooo, it's that time of the month again...(albeit a little late)....Daring bakers!
The August 2009 Daring Bakers' challenge was hosted by Angela of A Spoonful
of Sugar and Lorraine of Not Quite Nigella. They chose the spectacular Dobos
Torte based on a recipe from Rick Rodgers' cookbook Kaffeehaus: Exquisite
Desserts from the Classic Caffés of Vienna, Budapest, and Prague.
So basically the Dobos Torte is a sponge layer cake, layered with buttercream, and topped with caramel-coated pieces of cake.
The torte itself was really easy, but man...that caramel piece gave me sooo much trouble.
Yolks and sugar
Lightened
Folding

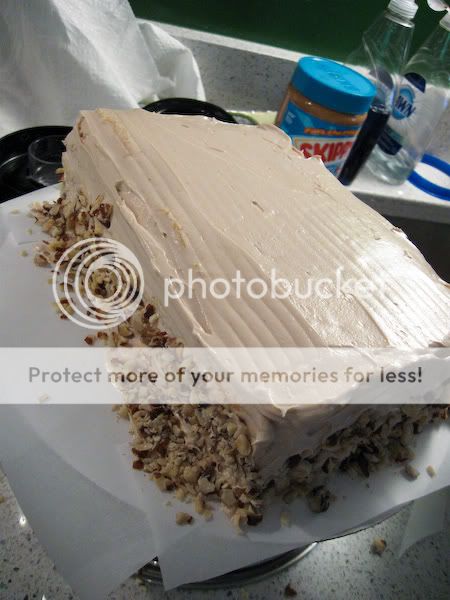

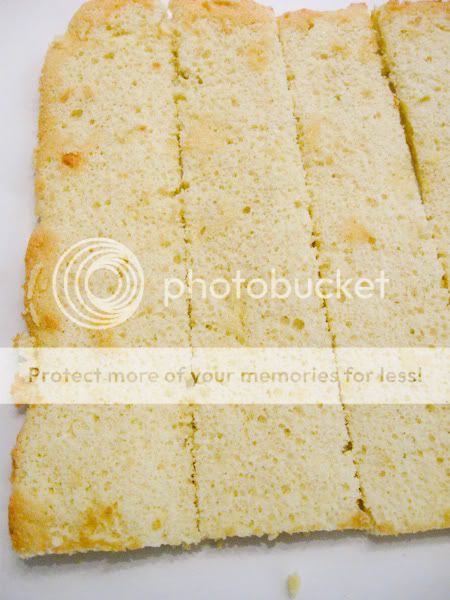


Onto the recipe!
Dobos Torte:
Sponge layers:
6 large eggs, separated
1 1/3 cups of powdered/confectioner's/icing sugar
1 tsp vanilla
1 cup of flour
Pinch of salt
Preheat oven to 400 degrees Fahrenheit
Either do a lot of work and line 6 round pans with parchment paper, or do what I did, and line a half-sheet pan with parchment paper. XD
Beat the egg yolks and 2/3 of a cup of the sugar until it's thick and lighter in color.
In another bowl, whip the egg whites until soft peaks form. Beat in the rest of the sugar and beat until stiff, shiny peaks form.
Fold the egg whites into the yolks.
Slowly fold in the flour and salt.
Spread a thin thin thin layer of the batter into the pan. Make sure it's even on top. (you can put another layer of parchment paper on top and press a similar pan over that...if you get what I'm saying...to even it out XD)
Then bake for about 5-10 minutes, or until the cake is slightly browned on the edges.
Slice and/or halve as you please. (it depends on what shape/size/how many layers you want)
Buttercream:
I know you all know this recipe by heart now, right? :P
Caramel :
1 cup of granulated /caster/superfine sugar
12 tbsp water
8 tsp lemon juice
1 tablespoon of NEUTRAL oil.
Reserve one of the cake layers
Copypasta recipe!
"1.Choose the best-looking cake layer for the caramel top.
To make the caramel topping: Line a jellyroll pan with parchment paper and butter the paper.
Place the reserved cake layer on the paper. Score the cake into 12 equal wedges. Lightly oil a thin, sharp knife and an offset metal spatula. 2.Stir the sugar, water and lemon juice in a small saucepan.
Bring to a boil over a medium heat, stirring often to dissolve the sugar.
Once dissolved into a smooth syrup, turn the heat up to high and boil without stirring, swirling the pan by the handle occasionally and washing down any sugar crystals on the sides of the pan with a wet brush until the syrup has turned into an amber-coloured caramel. 3.The top layer is perhaps the hardest part of the whole cake so make sure you have a oiled, hot offset spatula ready.
I also find it helps if the cake layer hasn't just been taken out of the refrigerator.
I made mine ahead of time and the cake layer was cold and the toffee set very, very quickly—too quickly for me to spread it. Immediately pour all of the hot caramel over the cake layer. You will have some leftover most probably but more is better than less and you can always make nice toffee pattern using the extra to decorate. Using the offset spatula, quickly spread the caramel evenly to the edge of the cake layer. Let cool until beginning to set, about 30 seconds. Using the tip of the hot oiled knife (keep re-oiling this with a pastry brush between cutting), cut through the scored marks to divide the caramel layer into 12 equal wedges. Cool another minute or so, then use the edge of the knife to completely cut and separate the wedges using one firm slice movement (rather than rocking back and forth which may produce toffee strands). Cool completely."
Assembly is simple.
Cake layer, buttercream, rinse, repeat.
Then top with the caramel in whatever fashion you choose.
I sprinkled ground hazelnuts on each layer, and pressed chopped nuts around the base of the cake.
Refrigerate the cake, but let it come to about room temperature before cutting.
Thursday, August 6
I party hard with Pictionary and baked goods
Yeesh, I am horrible at doing things in a timely manner.
So I have this group of friends that I've known since we were 8 years old (11 years!).
After middle school, we were spread out among at least 5 different high schools, but more likely 7 or 8. And of course, after high school, we're spread out over tons of colleges, in various states. But! During breaks we still manage to get together and act like we're ten years old again. Thursday, we all met up at Stephanie's house for PICTIONARY and Greek food. (because that's how these 19 year-olds party...with board games and Kool Aid). We started out with a rousing game of Apples to Apples, where I got the coveted "Helen Keller" card, and used it in conjuction with "Visionary". I'm offensive and that's okay. :) (and don't think it's too bad, I took three years of American Sign Language and have watched The Miracle Worker more times than you've wiped your butt XD )
Then there was some other round, and I'd played "Custer's Last Stand"
It didn't win.
So I, the drama queen that I am, exclaimed: "Custer failed me again! First at Little Big Horn, and now at Apples to Apples"
My friend Laura found this to be the most hilarious thing ever:
"She said it like it was SO personal!"
Haha.
ANYWAY. Then we got down to Pictionary, where my partner Lindsey drew this masterpiece
Can you figure out what it's supposed to be? I got it on the first try and baffled the rest of the group.
A SECOND ANYWAY, because I have failed to tell you what I even made that day! I'm sure you all remember those blackberries I picked with my mother. Well, I still had a few (and I mean a FEW) left over, so I decided to make a blackberry crumble bar. But then I realized that I really didn't have enough to do a whole pan, so I made them in the silicone baking cups my dad bought me a couple of weeks ago. I also made strawberry and chocolate ones. The fruit ones got DEMOLISHED at the party. I took the leftover chocolate ones to my grandmother's house while I got my hair done (down the street) and by the time I got back, she'd eaten all but one! And my grandmother eats like a bird, let me tell you. So I consider these a big hit, and hopefully, you'll like them too :)
Unbaked crusts
Blurry and unbaked D:
Fresh out of the oven, and fresh out of focus XD
Done!
2 - 2 1/2 cups of fruit (berries, peaches, plums are good ideas) (or chocolate, if you wanna go that route)(berries, peaches, plums are good ideas)
1 1/2 cups flour
3/4 cups sugar + a few tablespoons for the fruit
3/4 cup cold butter, cubed
1 egg
pinch of salt
crumble:
1 cup of rolled oats
3/4 cup of flour
1/2 cup of sugar
1/4 cup of dark corn syrup or molasses
3 tbsp softened butter
Preheat oven to 375 degrees Fahrenheit.
Mix together the 3/4 cup of sugar, flour, and the salt. Add the egg and the butter. Cut in the butter with a pastry cutter or a fork OR be like me and rub it in with your fingers. JUST your fingers though, your palms are generally too warm and will melt the butter.
Make sure the butter is incorporated, to the point that it looks sandy. If you have big chunks of butter, it's not the end of the world, but the bar will look like you're trying to give someone a heart attack XD
Press that into a pan. Any pan will do. Just remember that the smaller the pan, the thicker the crust, so it's all down to your preferences. Bake the crust until it's a little golden.
While the crust is baking, mix together the fruit and the sugar and set it aside. Then mix together all the ingredients for the crumble in a separate bowl. You can substitute the sugar and molasses for just brown sugar.
Once the crust is baked a bit, spread the fruit over the crust. Then kind of sprinkle the crumble topping over the top of the fruit. Put the pan back in the oven and bake until the crumble topping gets a little brown.
LET COOL.
This is soooo imperative. If you don't let it cool fully and you try to cut it, you'll just make a big mess. It's got to cool and set up, so don't go making this the hour before you want to serve it, especially if you're going to cut and transport it.
Oh, and a hint for the pictionary picture...it's an object. XD
Friday, June 5
Sunburned Zebra Cake
Today, I was bored.
Story of my life :P
Since I was bored, I decided to make a cake. But! What kind of cake?
Oh, what a dilemma.
I eventually decided on a zebra cake, but pfft, that's boring. I wanted to give it a kick with another layer.
Scouring the kitchen for something to flavor the third layer with, I found a jar of raspberry jam.
Thus, the sunburned zebra cake (obviously named) was born.
:D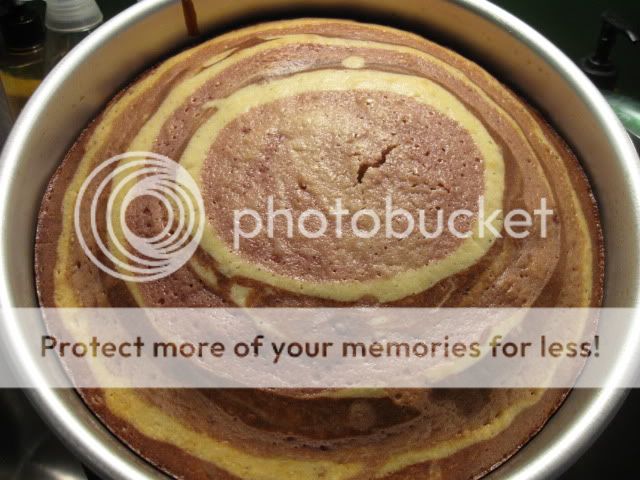


Sunburned Zebra Cake:
2 cups of flour
1 cup of sugar
1 tbsp of baking powder
1/2 tsp of salt
1 cup of milk
1 cup of veggie/canola oil
4 eggs
Flavorings:
1/2 tsp vanilla extract
1 tbsp cocoa powder
2 tbsp raspberry jam (or any red berry jam/jelly)
Preheat the oven to 350 degrees Fahrenheit.
You can use any number of pans for this. I used a 9 inch round, but a 6 inch would work just fine too, as would a 10 inch. Anyhoo, grease the pan.
Mix together the flour, salt, and baking soda in a bowl.
Beat the eggs and sugar in another bowl until light yellow. Add the milk and oil and mix until incorporated.
Add the flour mixture and mix until everything's just come together.
Divide the batter equally into three containers (cups are best). Flavor each container of batter accordingly. (one chocolate, one vanilla, one berry)
Start by pouring about 1/4 of the first batter into the pan, quickly pour the same amount of the next into the middle of the first batter. Do the same with the last batter. Repeat the process until all the batter is used up.
Bake the cake until a toothpick inserted into the center comes out clean, about 55 minutes. (Might be less, just make sure to check the cake)
My mom made me make a glaze for it, which was just milk, powdered sugar, nutmeg, cinnamon, and vanilla, mixed together.
That poor burnt zebra D:
Saturday, May 30
"Happy Birthday to Us!" Cupcakes
Sunday is my 19th birthday (yay me!), and Thursday is my friend Arielle's 19th birthday (yay her!). This weekend, we're going to NYC, to see Avenue Q and In the Heights. In celebration of our turning-19-ness, I made chocolate cupcakes, with milk chocolate Swiss buttercream.
Oh. My. God.
This buttercream is heaven! So much work, true, but totally worth it. I'm drooling just thinking about it. (I honestly ate like 4 heaping spoonfuls of it while decorating the cupcakes, haha)
Swiss buttercream is by far my favorite frosting, not because of its ease (...'cause it's not easy...at all), but because it's so light and creamy, you forget you used nearly a pound of butter to make it.
Yep. A pound. Almost.
(Just pretend I didn't say that and it'll be okay :) )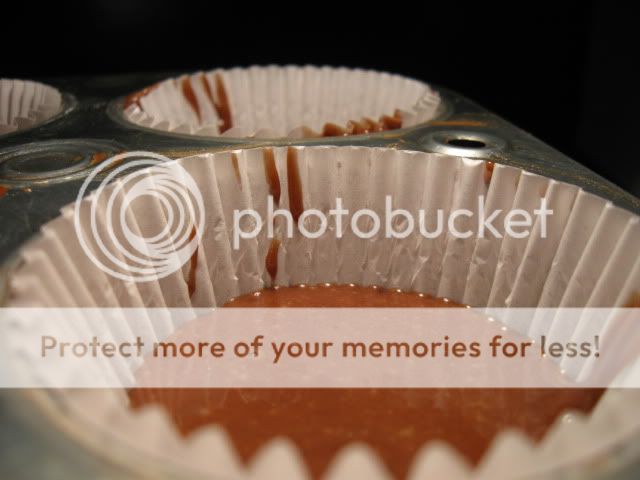


Chocolate Cupcakes:(makes...2 dozen-ish)
2 Cups of sugar
1 3/4 Cups of flour
3/4 cup of unsweetened cocoa powder. (I used Hershey's, but I usually use Ghirardelli's)
2 tsps of baking soda
1 tsp of baking powder
1 tsp of salt
2 eggs
1 cup of sour cream
1 cup of boiling water
1/2 cup of vegetable/canola oil
1 tsp of vanilla extract
Preheat the oven to 350 degrees Fahrenheit. Line your cupcake tins. Stir the flour, sugar, cocoa powder, baking soda, baking powder, and salt together. Add everything else. Mix. (OH MY GOD THE EASIEST CAKE EVER. The difficulty of the frosting makes up for it :P ) Pour into the tins, filling each mold about 3/4 of the way up. (I did my first batch 1/2 of the way up, just to be safe, and they were a little smaller than I'd like, so 3/4 is good). Bake for about 15 minutes, or until a toothpick inserted into the middle (of one of the inner cupcakes) comes out mostly clean (a few crumbs are good!).
And now for the true test of endurance!
Swiss Buttercream:
4 oz egg whites (...I just used 4 egg whites. I'm too lazy for a scale and all of that)
1 Cup of sugar
2 tbsp of corn syrup
3 sticks of unsalted butter, softened. (3/4 of a pound. My original recipe said 2.5 sticks but I forgot and it was still good with 3, hehe.)
Whisk egg whites, corn syrup, and sugar in a bowl over a pot of simmering water. (I use my stand-mixer bowl, to make it easier). Keep whisking. Keep whisking. Just keep going. Keeeeeep whisking until a thermometer inserted into the mixture reads 140 degrees. (Though honestly, as long as the sugar's melted, you're good. You can check that by rubbing a bit between your fingers and checking for a grain). Once it's reached that temperature, whisk it (I hope you have a standing mixer) until it's about body temperature. (So it should feel BARELY warmer than your finger). Once it's reached that stage, change to a regular beater/ paddle attachment and add in your butter, a tablespoon at a time. Once everything's come together, you can add in any kind of flavoring you like, but try to keep excess water to a minimum. I added in a few tablespoons of melted chocolate. Yummmm.
Yesterday, I tried a different recipe for chocolate cupcakes, and failed miserably. Wanna see? Of course you do.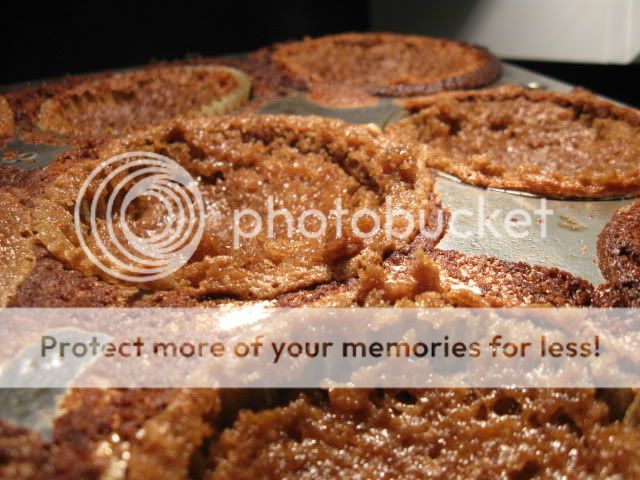
D:


