

So the muffins were good...still not exactly what I was looking for in a muffin, so I'll hold off on posting those for now.
Buuuuut, I do have more cookies to share!
These are mini cookies shaped like oak leaves, maple leaves, pumpkins and acorns.
I have learned, through a couple of days of decorating mini cookies, that they are 5 billion times more work than regular cookies. So much less room to work on, and just so /many/ to do in the first place.
But they're so cute! So I think I'm going to have to get mini cutters for every season...like I don't have enough cookie cutters as it is...my storage drawers are almost full, haha.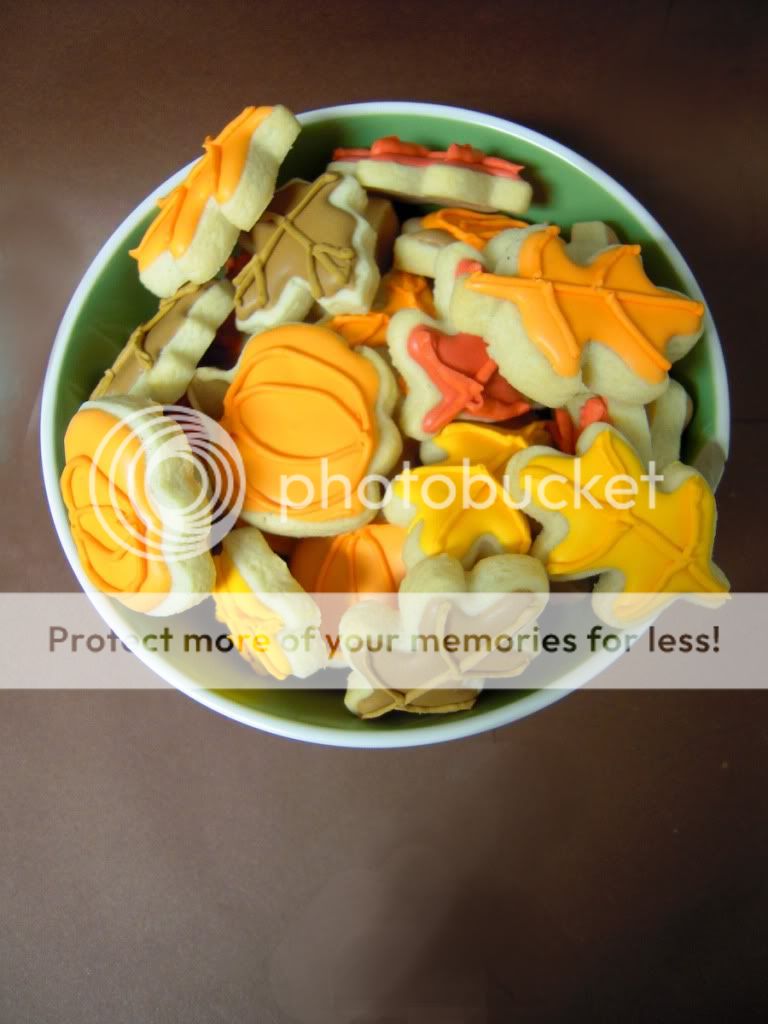


Just like the Halloween ones, you can make 'em yourself
or I can make them for you :)
I am worn out. Hahaha.
Showing posts with label decorating. Show all posts
Showing posts with label decorating. Show all posts
Saturday, October 9
Mini Fall Cookies!
Wednesday, October 28
Royal Icing
I figured I'd just give it its own separate post so you guys don't have to scroll through a whole recipe to find it. :)
Royal Icing:
by Alton Brown
Copied and pasted because it's easier that way :)
"3 ounces pasteurized egg whites (that's about 3 egg whites. You know Alton and his preciseness)
1 teaspoon vanilla extract
4 cups confectioners' sugar
In large bowl of stand mixer combine the egg whites and vanilla and beat until frothy. Add confectioners' sugar gradually and mix on low speed until sugar is incorporated and mixture is shiny. Turn speed up to high and beat until mixture forms stiff, glossy peaks. This should take approximately 5 to 7 minutes. Add food coloring, if desired. For immediate use, transfer icing to pastry bag or heavy duty storage bag and pipe as desired. If using storage bag, clip corner. Store in airtight container in refrigerator for up to 3 days."
Sunday, October 25
Kiara's Rotten, Awful, No Good, Very Bad Day Cookies
So lately, I've been feeling rather down.
The stress of school and my personal life are taking their toll on me.
Today, in the midst of cleaning my horribly messy room, I said, in much harsher words, "Screw this!" and I went to make cookies.
What kinds of things does one want to see when one is down? Smiley faces and rainbows, of course!
So I made the cookies, and made the bazillion colors of icing and all was good.
Until I really looked at the kitchen and realized that I had a huge mess to clean up.
Welcome back, stress! Haha, it wasn't that bad, but the situation was kind of ironic. :)
Anyhoooo, here we go!
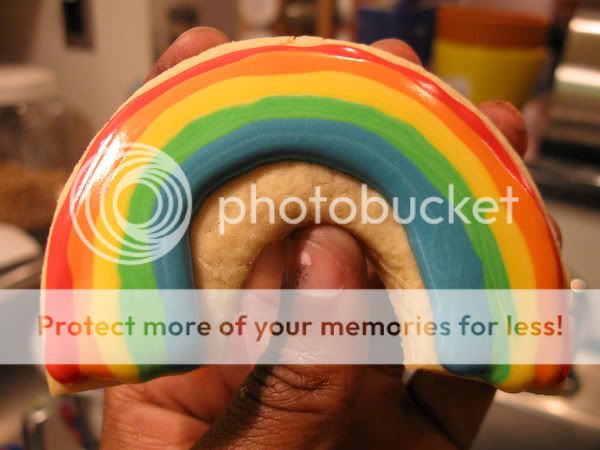
Messed up a little bit, but for the most part, a decent rainbow :)

it's not happy that I bit it in the head XD
This is the happiest cookie I've ever seen :P

Buttery Sugar Cookies:
1 1/2 cups of flour
1/2 cup of sugar
1 tsp of vanilla
4 tbsp of butter, softened
1 egg
1 tsp of baking powder
Preheat the oven to 350 degrees Fahrenheit.
Cream the butter and sugar until light and fluffy.
Add in the vanilla and egg and beat until fully incorporated.
Add the flour and baking powder, and mix until the dough comes together.
The dough might be a little dry, so if you need to, add some water until it comes together better.
Chill the dough for about a half an hour, it probably won't need it, but chilled dough is always better than room temperature dough. :)
Roll it out (whatever thickness you want, they'll only rise a little bit) and cut out your shapes.
Bake them for 15-20 minutes (the edges should start to get a little bit brown)
Let them cool completely before decorating.
Decorate with royal icing (recipe here!)
Oh and I secretly borrowed my father's camera, so I'm back...for now...until he notices...hehehe.
Saturday, May 30
"Happy Birthday to Us!" Cupcakes
Sunday is my 19th birthday (yay me!), and Thursday is my friend Arielle's 19th birthday (yay her!). This weekend, we're going to NYC, to see Avenue Q and In the Heights. In celebration of our turning-19-ness, I made chocolate cupcakes, with milk chocolate Swiss buttercream.
Oh. My. God.
This buttercream is heaven! So much work, true, but totally worth it. I'm drooling just thinking about it. (I honestly ate like 4 heaping spoonfuls of it while decorating the cupcakes, haha)
Swiss buttercream is by far my favorite frosting, not because of its ease (...'cause it's not easy...at all), but because it's so light and creamy, you forget you used nearly a pound of butter to make it.
Yep. A pound. Almost.
(Just pretend I didn't say that and it'll be okay :) )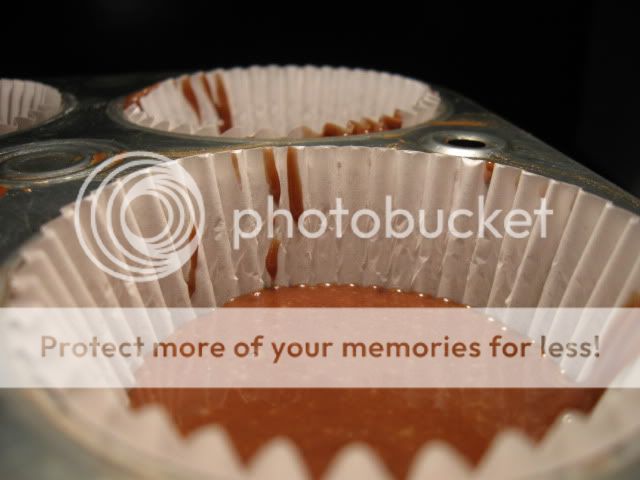


Chocolate Cupcakes:(makes...2 dozen-ish)
2 Cups of sugar
1 3/4 Cups of flour
3/4 cup of unsweetened cocoa powder. (I used Hershey's, but I usually use Ghirardelli's)
2 tsps of baking soda
1 tsp of baking powder
1 tsp of salt
2 eggs
1 cup of sour cream
1 cup of boiling water
1/2 cup of vegetable/canola oil
1 tsp of vanilla extract
Preheat the oven to 350 degrees Fahrenheit. Line your cupcake tins. Stir the flour, sugar, cocoa powder, baking soda, baking powder, and salt together. Add everything else. Mix. (OH MY GOD THE EASIEST CAKE EVER. The difficulty of the frosting makes up for it :P ) Pour into the tins, filling each mold about 3/4 of the way up. (I did my first batch 1/2 of the way up, just to be safe, and they were a little smaller than I'd like, so 3/4 is good). Bake for about 15 minutes, or until a toothpick inserted into the middle (of one of the inner cupcakes) comes out mostly clean (a few crumbs are good!).
And now for the true test of endurance!
Swiss Buttercream:
4 oz egg whites (...I just used 4 egg whites. I'm too lazy for a scale and all of that)
1 Cup of sugar
2 tbsp of corn syrup
3 sticks of unsalted butter, softened. (3/4 of a pound. My original recipe said 2.5 sticks but I forgot and it was still good with 3, hehe.)
Whisk egg whites, corn syrup, and sugar in a bowl over a pot of simmering water. (I use my stand-mixer bowl, to make it easier). Keep whisking. Keep whisking. Just keep going. Keeeeeep whisking until a thermometer inserted into the mixture reads 140 degrees. (Though honestly, as long as the sugar's melted, you're good. You can check that by rubbing a bit between your fingers and checking for a grain). Once it's reached that temperature, whisk it (I hope you have a standing mixer) until it's about body temperature. (So it should feel BARELY warmer than your finger). Once it's reached that stage, change to a regular beater/ paddle attachment and add in your butter, a tablespoon at a time. Once everything's come together, you can add in any kind of flavoring you like, but try to keep excess water to a minimum. I added in a few tablespoons of melted chocolate. Yummmm.
Yesterday, I tried a different recipe for chocolate cupcakes, and failed miserably. Wanna see? Of course you do.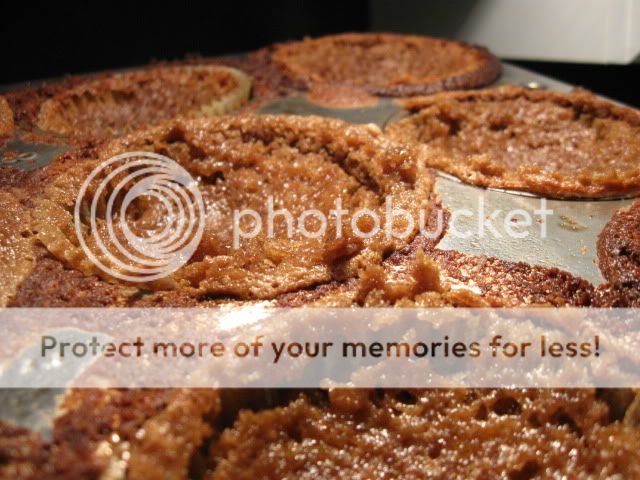
D:
Thursday, May 28
Way overdue Christmas cookies!
Wow. I am "epic fail", as the kids say. In my effort to hide the secret of these cookies (surprise gifts), I entirely forgot to post, or even write about them. Luckily, they're a previously posted recipe, so I'll just link to those, but they were so cute (and so much work!) that I have to post them.
While looking for better pictures of my ginger cookies to update here and to try and post on foodgawker, I discovered the pictures of the xmas cookies! So, here I am. :P
Cookie Recipe
Royal Icing Recipe
So. Many. Cookies. Oh. My. God.
Pretty star :P
Richard's Superman cookie :D
Stars!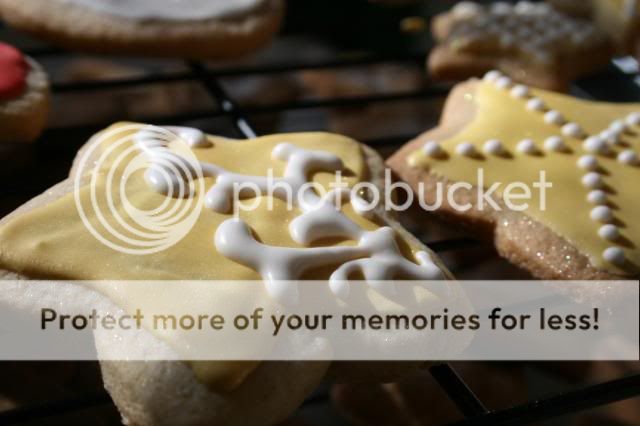
More stars!
Zi's Ninja
The boys' initials, before.
The boys' intials, after. In bad lighting. :) Yes, the PG is decorated like Joker.
Tuesday, December 30
Sugar Cookies For Lizzy!
I bought a few new cookie cutters at A.C. Moore the other day and figured I might as well try them out :D I only used 3 of them today, so there are 2 mystery shapes to look forward to in the future, hehe.
Anyway, I decided to make some girly flower cookies for this 9 year old I used to babysit, Lizzie, since we were supposed to visit her and her grandparents today. (we didn't get to, but we will tomorrow)
After discovering that we weren't going to visit today, I decided to make more cookies. Ducks and Hearts! Because, you know, that's logical :P

I'd also bought some awesome gold pearl dust and figured that it'd look good on the cookies! (which it totally did)

On to the recipe!
Sugar Cookies:
1 1/2 Cups of Butter
2 Cups of Sugar
4 Eggs
5 Cups of Flour (you'll probably need to add more. This is a sticky recipe!)
1 tsp. of Vanilla
1 tsp. of Salt
2 tsps. of Baking Power
Preheat the oven to 400 degrees Fahrenheit.
Cream together the Butter and Sugar, until fluffy and much lighter in color. Add in the Eggs, one at a time, and the Vanilla.
After combining the Flour, Baking Powder, and Salt, slowly add it to the Butter mixture.
LET CHILL FOR AT LEAST AN HOUR.
Please. Seriously. Unless you're planning to make drop cookies out of these, this dough needs to be chilled.
After chilling, roll out to 1/2 - 1/4 of and inch thick. Cut out your favorite shapes!
Bake for 6-8 minutes, or until the edges start to brown a little.
Decorate with Royal Icing. :)
Any kinds of things you guys would like to see next?
Saturday, December 27
Pretty Pastel Cookies
- Today, with the addition of a spiffy new faucet for our sink, our kitchen is technically finished. (not at all organized, but finished :D )
So I scoured the internet for a recipe that called for no eggs, and I found one. It's actually quite nice, but more similar to shortbread than your typical sugar cookie. Because they're rather plain-looking, I decided to ice them, royal style. Haha. :)
I wanted to save up my food coloring, so I made pastel colors. It looks like I'm going to a baby or bridal shower ;)


"Shortbread" Sugar Cookies:
1 Cup of Sugar
1 Cup of Butter
1 Cup of Milk
2 Cups of Flour (more may need to be added, until the dough is less sticky, so keep that in mind)
1 tsp. of Baking Soda
1 tsp. of Baking Powder
1 tsp. of Vanilla
1 tsp. of salt
Preheat oven to 425 degrees Fahrenheit. (! I know, but they don't bake very long)
Sift together the flour and baking powder. Dissolve the salt and baking soda in the milk.
Cream together the butter and sugar. Once entirely creamed, add the vanilla.
While the mixer is going, slowly add in the milk mixture. After the milk is incorporated, add in the flour, bit by bit. After the dough is finished, I suggest chilling it for a while in the fridge, to make it easier to work with. Either way, when you're ready, roll out the dough and cut out your desired shapes. I used the rim of a glass, whatever you have on hand works :)
Bake cookies about 10-15 minutes. Really, whenever you notice the edges are getting a little brown. This especially depends on your oven. While they cool, get started on your royal icing.
Royal Icing:
by Alton Brown
Copied and pasted because it's easier that way :)
"3 ounces pasteurized egg whites (that's about 3 egg whites. You know Alton and his preciseness)
1 teaspoon vanilla extract
4 cups confectioners' sugar
In large bowl of stand mixer combine the egg whites and vanilla and beat until frothy. Add confectioners' sugar gradually and mix on low speed until sugar is incorporated and mixture is shiny. Turn speed up to high and beat until mixture forms stiff, glossy peaks. This should take approximately 5 to 7 minutes. Add food coloring, if desired. For immediate use, transfer icing to pastry bag or heavy duty storage bag and pipe as desired. If using storage bag, clip corner. Store in airtight container in refrigerator for up to 3 days."
For the base color, I just spread the icing over the cookies with a knife. For the white piping, I cut the tiniest corner imaginable off of the tip of a plastic baggie. Make sure to clean the tip of that quite often, though, as the icing dries over the tip very quickly and makes it hard to make straight lines. I know -___-
So yay! First installment of flour on her nose. Stay tuned for more! (probably cookies. I love cookies. :D )
Subscribe to:
Posts (Atom)

