


Hi wow I'm sorry....photobucket has made this look like trash
I'll fix this all as soon as I can 🙃🙃🙃
Friday, July 7


Wednesday, September 14
Blueberry & Blackberry Rice Pudding
Helloooooo. I made this stuff ages ago, but I'm only just now getting around to writing up a post. Why? 'cause that's just how I am, haha. But also because working 5 days a week plus full time classes makes me want to blow my brains out.Anyway, as you can tell, I'm really really into blueberries right now. I love rice pudding. I love blueberry desserts. It's a logical progression. I added in the blackberries because I had some in the fridge I completely forgot about (and they're prettier to garnish with than frozen blueberries, haha)
Onto pictures and the recipe!


I couldn't get the last two pictures to look right, but I hate only having one picture, so...:(
Berry Rice Pudding
1/4 cup of rice
2 cups of water
3 1/4 cups of whole milk
1/4 cup of sugar
1 tbsp vanilla extract
~ 3/4 mixed berries (I suggest blueberries and strawberries. The seeds from blackberries are a little jarring in the finished pudding)
Put the rice and water into a pot and bring to a boil. Once it's boiling, lower the temperature and cook the rice for 5 minutes. Drain it, and set it aside in another bowl.
Rinse out the pot, and add the milk and sugar. Put the pan over medium-high heat. Once it boils, add in the partially cooked rice. Reduce the heat (but make sure it's high enough to bubble slightly), and let it cook, stirring occasionally, for about 35 minutes.About halfway through, add in the berries and the vanilla.
I like to mash up the berries with my spoon to really get the flavor in there, but it's up to you. The pudding won't be very thick when it's done, but that's okay, it'll thicken in the fridge. Pour it into a serving bowl, or individual dishes. Place plastic wrap onto the pudding, making sure to make it touch, so it doesn't develop a skin. Refrigerate for at least 6 hours. Or eat right away. But I find that the berry pudding tastes best cold. Share
Wednesday, August 24
Blueberry Ice Cream
MSZKW8P8KNW7
I suppose you all thought me dead. I wouldn't blame you.
The reality is just that work and school have left me completely drained, not to mention my irritation at not getting decent pictures.
I've finally managed a method of editing that gives me decent results, so that helps. And just for fun, I will show you a straight-from-the-camera shot vs one mostly edited. :)
Anyway, I really love blueberry desserts. I don't like blueberries just...raw, by themselves, but i just love love love blueberry syrup to death. So I make a lot of it, and flavor a lot of things with it. So here I am with ice cream. While it is custard based, it's still really simple, and it's really soft even straight out the freezer (so do eat it quickly, it melts like it's got someplace else to be!)
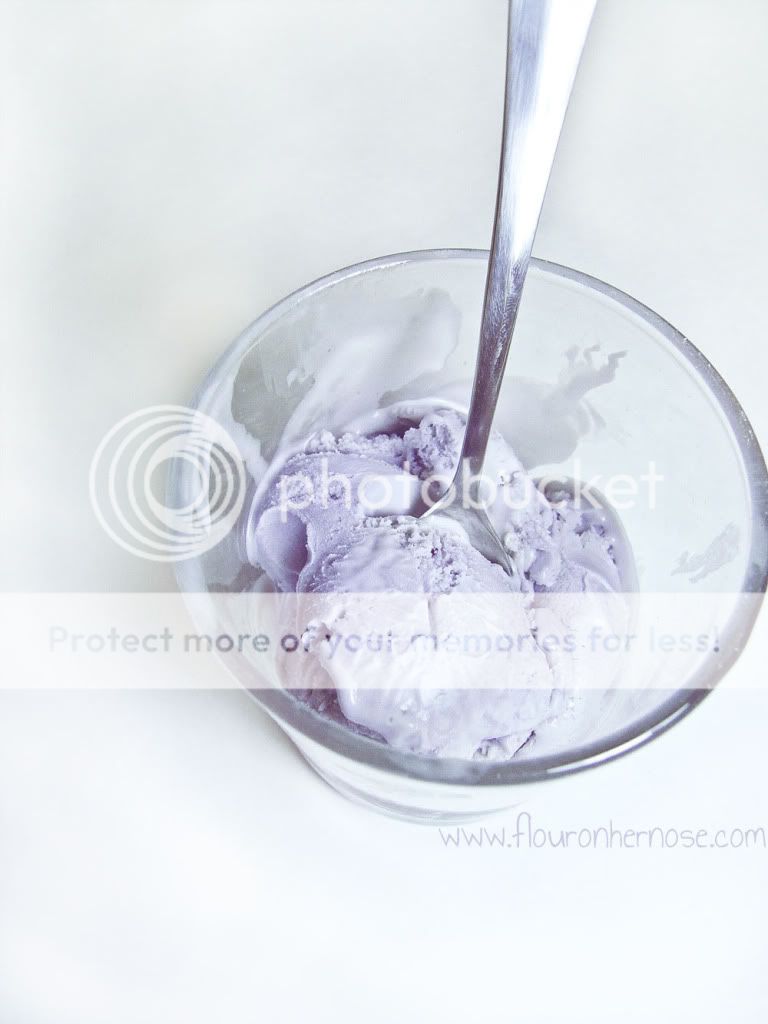

Blueberry Ice Cream:
3 cups heavy cream
4 egg yolks
1 1/4 cups of sugar (I used turbinado, because I'm quite obsessed with it lately)
1 cup of blueberry puree or 1/2 cup of blueberry syrup (blueberries cooked down with a bit of water and a bit of sugar. If you use the syrup, cut back a bit on the sugar)
1 T vanilla
1 T lemon juice
Mix the sugar and half of the cream together and warm it up in a small pot. Whisk the egg yolks , then pour the warmed cream over the yolks while still mixing. Put it all back into the pot and set it on the stove, over medium heat, stirring constantly. When the mixture coats the back of a spoon, strain it (to catch any cooked egg bits) into the rest of the cream, and mix. Add in the blueberry, vanilla, and lemon juice. Put it in the fridge until completely cold.
Follow your ice cream maker's instructions. :)
Of course, you can use any fruit you like in this recipe, and add bits of other flavorings...a strawberry balsamic would be nice :)
Here's the before and after and after:
MSZKW8P8KNW7
Share
Wednesday, May 4
Super fun chocolate giveaway.
So I recently bought some chocolate molds.
Logically, that leads to experimentation.
And, as what usually happens, I make many many more things than I will eat.
SO HERE I AM AGAIN, to give away things that I have made. :)
I have 13 chocolate bars.
11 are average sized, one is larger than usual, and one is SUPER FREAKING HUGE.
It's like a pound.

 Super giant S'more Bar (chocolate, toasted marshmallow, graham cracker)
 Large mixed fruit rainbow bar
 Crispy Crunch Bar
 Turtle Bar (pecan & caramel)
 Cookies & Cream bar
 White Chocolate & Mint
 Creamsicle
 Milk Chocolate & Mint
 Strawberry & Cream
 Caramel-filled
 "Chocolate Covered Strawberries)
 Key Lime Pie
 Cherry Chocolate
Winners of the two larger bars will get only those, other winners get two smaller bars each. And then there's an extra bar that I will just give to someone who wins, depending on which one is left over. :3
So here's how to enter:
You MUST:
Post a comment here with your top three preferences of bars. If you don't state your preferences, I won't know what to give you, and you'll be ineligible to win.
Provide an email address or contact method in your post. If you don't, you are ineligible to win, as I have no way of contacting you
Reside in the US. sorry guys, it's chocolate, and it's iffy shipping it as it is :(
You MAY, for additional entries:http://www.blogger.com/img/blank.gif
Reblog this (link here) post on Tumblr and post a comment here with the link to your reblog.
Retweet this (link here) tweet on Twitter and post a comment here with your twitter username or a link to the tweet.
All entries must be in separate comments.
GIVEAWAY ENDS @ 11:59 PM EST WEDNESDAY, MAY 18TH
Winners will be chosen using a RNG.
I will contact all winners at that time. Chocolates should be sent out within a week. :)
If winners do not respond by the 23rd, I reserve the right to choose a new winner for that item.
Monday, March 28
Japanese Strawberry Shortcake
Because my work schedule varies so wildly (I either start work at 5:30 pm or 10 am or 1 or 2 pm), so does my sleep schedule.
And because of that, I feel like a zombie.
And zombies don't bake.
I think.
I'm pretty sure they prefer their brains raw.
But I digress.
With this recipe comes another side of excuses. It seems to be my MO lately, but such is life. I finally have enough money to properly bake, but of course I don't have the time to do it as often as I'd like.
Life, eh?
And starting at the end of May, I'll be in culinary school (yahoo!), so there's another obstacle.
But on the other hand, it'll teach me new things to do, though I won't be doing pastry for a while yet.
ANYWHOO, ON TO PICS AND THE RECIPE.
I kept looking for recipes to use, because I'd never made one of these before, but none of them /seemed/ right. So I just used my own sponge recipe, and my own stabilized whipped cream recipe. None of the recipes I saw for the whipped cream had enough gelatin, and I wanted it to set up really well, so it would slice cleanly.
Anyway, I think I got it, but next time, instead of just slicing the strawberries in half, I'll chop them up and mix them into the cream. It looks nicer sliced, but it's harder to get through them with your fork without smashing the cake to bits, haha.
I really really like this cake better than the American version. I much prefer the delicate sponge over a biscuit base. And the stiffer cream is nicer. And it's prettier. So Japan wins this one :)

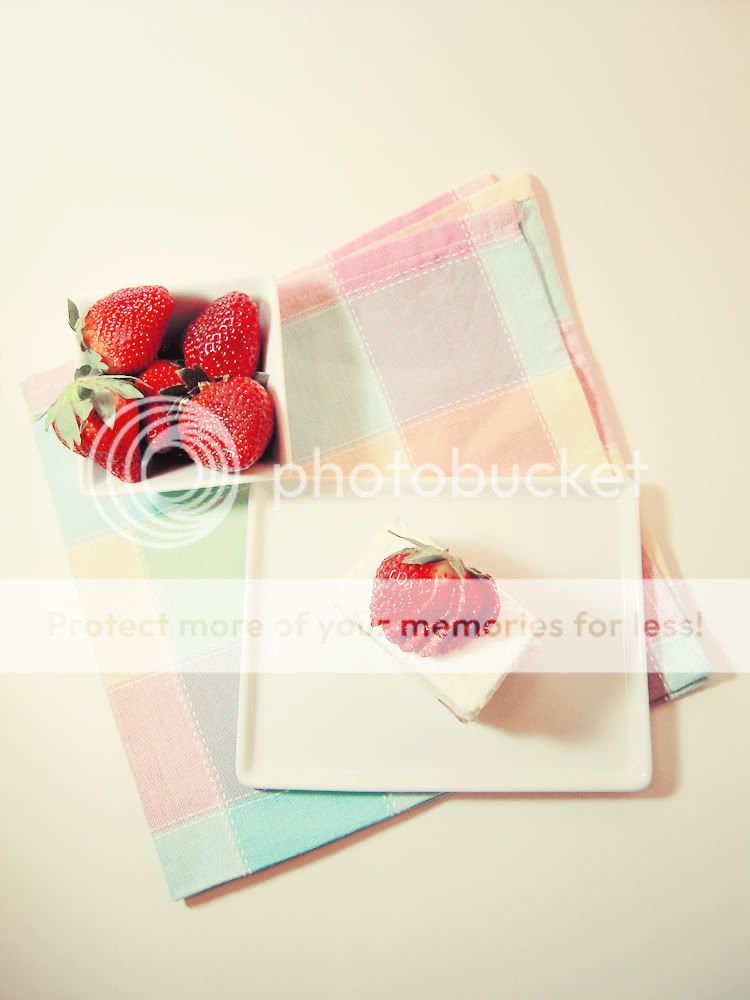


Japanese Strawberry Shortcake:
Sponge cake:
3 eggs, separated
1 whole egg
50 g flour
50 g sugar
50 g oil
pinch of salt
1/2 tsp vanilla
also:
Handful of strawberries, for assembly, later.
This is a super duper easy recipe to remember. 50/50/50, haha.
If you guys don't have a scale yet, get one. For things that are really delicate, it's indispensable.
Preheat your oven to 300 degrees Fahrenheit.
Line an 8x8 pan, or a cake pan. (8 inches should be okay for that, but you'll probably have thinner layers)
Whip the egg whites until really frothy. Add in the sugar, and continue to whip until stiff peaks form.
Beat the egg yolks, whole egg, flour, oil, salt, & vanilla until totally combined.
It should be yellow, and a very very thick and odd texture. If you pick up the spoon/whisk/beater and think "what the hell is this?", then it's right.
Mix a few spoonfuls of the egg whites into that mixture, just to make it lighter and easier to fold the rest of the whites into. Trust me, any time you have to fold egg whites into a really thick batter like this, do that trick.
Fold the rest of the egg whites into it, making sure to fully incorporate them. (I made this cake once and was very lazy and I had random spots of cooked meringue in my cake because I didn't mix it well.) So just make sure it's uniform in color, with no streaking.
Bake for 25-30 minutes, or until the top is golden brown. (It's better to slightly overbake this cake than underbake it)
Let the cake cool and get started on the whipped cream.
Stabilized whipped cream:
1 1/2 cups of whipping cream
1/2 cup of sugar (you can adjust this depending on your tastes. I tend to add a bit more because I am a sugar junkie >__> )
2 1/2 Tbsp gelatin (that's generally one packet)
1 Tbsp cold water
Put the cold water in a small dish and bloom the gelatin. (sprinkle it over the water and wait until it's absorbed all of it)
Microwave it for a few seconds, until it's liquid.
Set aside to cool.
Whip the cream and sugar to stiff peaks.
If your gelatin still hasn't cooled down enough (ie, it's still steaming, like mine was), pour a bit of the cold cream into it. Works like a charm.
Pour the gelatin into the whipped cream with the mixer going, making sure to get it all incorporated, but don't whip it so much it makes butter!
Assembly:
Level your cake, and split it into two layers.
put a very thin layer of whipped cream down, then place cut, sliced, or chopped strawberries down. (this helps to keep the strawberry juice from making the cake soggy).
Cover the strawberries completely with more cream.
Put the top layer on then ice the top with cream.
You can do the sides, but I think it looks fine with just the top done :)
Let chill in the fridge for at least a half an hour, so the gelatin can set up at least a little.
Slice into cute little rectangles and garnish with strawberries :)
Thursday, March 3
Chocolate, Banana & Caramel Entremet
I feel like whenever I open up the "create post" page on blogger, I have to find new words for apologies. My life really hasn't been conducive to posting, and so it's just hard to find the time/money. Also, I live in a basement apartment now, with no natural lighting (except for a tiny, high up window in my bedroom), so my photographs suffer.
I did buy a new lamp with some daylight CFL bulbs, and that greatly improved my photos!
Anyway, I finally decided that I would make something for the blog. Something pretty.
Unfortunately, my first attempt (a blood orange and pear entremet) didn't work as well as I'd hoped. It just didn't look as good as I wanted, and the cruddy lighting I had didn't help. It was sponge cake, mousse, and gelee. I wasn't a huge fan of the gelee, at least with that cake, so the next one I did was just mousse and cake.
And that brings me to what I'm going to show you guys today! A bit of warning: The following recipes are a result of some Frakensteining. But it's really really really good. Really good. REALLY. GOOD. Haha okay. If you're going to attempt it, make sure to read through the entire recipe. Certain things need to be finished in certain orders, because of the nature of the gelatin in the mousse and all of that. So even though all the recipes will come first, make sure to follow the order/timing of the assembly section :)

Chocolate, Banana, Caramel & Pecan Entremet:
(makes 1 8x8 entremet, will probably need to be trimmed)
Ingredients:
Chocolate Sponge Cake and Pecan Sponge Layer:
3 eggs, separated
1 whole egg
50 g of oil
50 g flour
50 g sugar
3 tbs cocoa powder
1 c coarsely ground pecans
dash of cinnamon
3 mousses:
1 cup heavy cream
1 Tbs sugar
1 banana
1/2 cup of chocolate
3 Tbs butter
1/2 cup of caramel
2.5 tbs gelatin (one packet)
Chocolate Ganache:
3/4 c heavy cream
1 c chocolate (this will probably make more than you need, but store it in the fridge or something XD)
Methods:
Sponge cake:
Preheat your oven to 300 degrees Fahrenheit.
Whisk the egg whites until frothy. Add the sugar, and whip to stiff peaks.
Whisk together the egg yolks, whole egg, and oil. Sift in the flour, and mix until it's well incorporated.
Mix a couple of spoonfuls of the egg whites into the yolk mixture, to make it easier to fold in. Then fold the lightened yolk mixture into the whites, carefully.
Set aside 1/4 of the mixture, and carefully fold in the pecans and the cinnamon. Spread out that mixture on a covered sheet pan, in approximately the size of the pan you're going to assemble the whole cake in. (if you have multiples of the same size, go ahead and bake it in a pan. I'm just trying to save you washing dishes XD)
Bake it until it's lightly browned on top, and set it aside.
Carefully mix the cocoa powder into the rest of the batter, and bake it in an 8x8 pan for ~15 minutes, or until it's lightly browned on top. (you can also use the toothpick test, but be careful, it might fall)
Set that aside, but wash out your pan.
Mousse:
Bloom the gelatin over 2 tbs of cold water
Whip the cream to stiff peaks (but be careful not to make butter!)
Banana:
Puree the banana, with the Tbs of sugar. Warm it up a little, and stir 1/3 of the gelatin into it, making sure it melts completely. Immediately fold into 1/3 of the whipped cream.
Chocolate:
Melt the chocolate with the butter over low heat. add in 1/3 of the gelatin, mix, and fold into 1/3 of the whipped cream
Caramel:
Melt the caramel, mix in the remaining gelatin, and fold into the remaining whipped cream.
Ganache:
Bring the heavy cream to a boil. Pour over the chocolate, and stir until completely combined. Let cool before topping the entremet.
AND FINALLY, ASSEMBLY:
Place the pecan sponge in a lined 8x8 pan.
Make the banana mousse, spread it over the sponge, and level it off with an offset spatula (greatest invention ever)
Split the chocolate sponge into two layers. Place one layer on top of the mousse, pressing down slightly.
Make the chocolate mousse, apply, and level.
Place the second layer of chocolate sponge.
Make the caramel mousse, apply, and level.
If the ganache is already room temperature, go ahead and pour a thin layer on top. If not, put the whole entremet in the freezer for a bit, and then pour the ganache on top.
Let it sit in the fridge overnight, slice, and enjoy. (because you deserved it...that was a lot of work!)
If you guys want the recipe/instructions for the caramel corkscrew & the candied pecan, just ask in the comments, and I'll put them in another post. :)
I'm sleepy now...bye! Haha :)
Sunday, February 6
Kiwi Sherbet!
I have been remiss in my blogging duties, but I do have an excuse.
First, I was sick for a couple of weeks, and hardly felt like being alive, much less baking anything.
Second, when I got back to my apartment, I discovered that my minor mouse problem had turned into a major mouse problem. Let's just say I found surprises in my bed and in my kitchen drawers. T____T
So aaaaaanyway, here's something entirely out of season. (but you know what? Sometimes ice cream is best in the winter. Just ask this guy.)
The best part, though? Three ingredients!
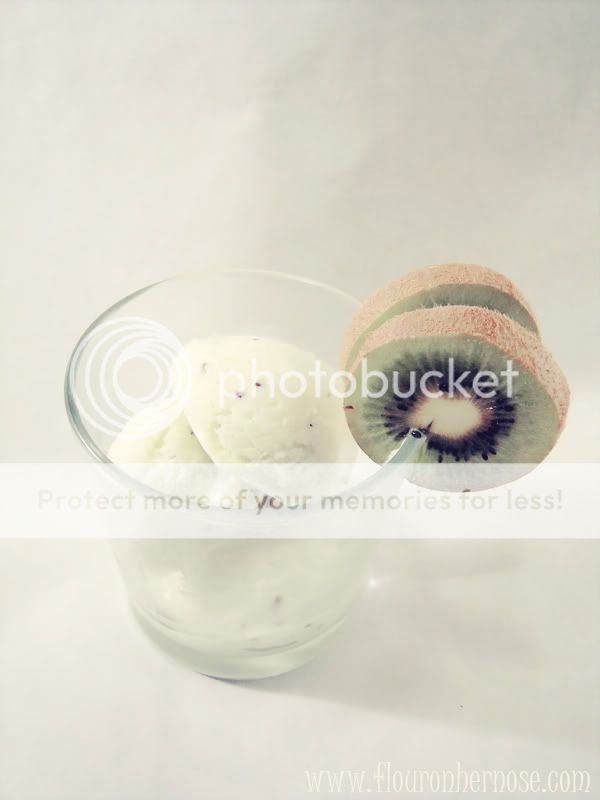

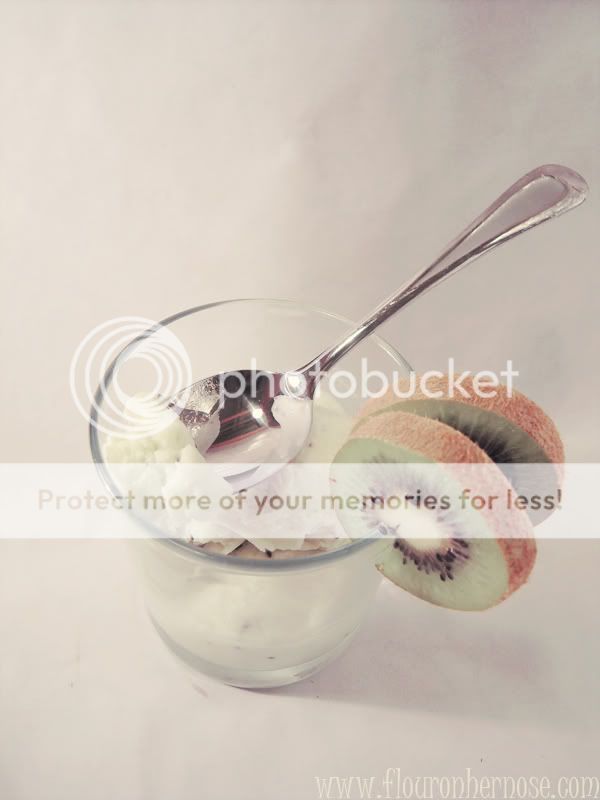
Kiwi Sherbet:
1/2 cup of heavy cream
1/2 cup of sugar
2-3 Kiwifruit (enough to make 1/2 cup of puree)
Mash up the kiwis, enough so that you don't have to blend them too much. If you blend them for too long, the seeds get pulverized and it's not pretty. Of course, you can always not use the part with seeds, but I think it looks better with them :)
Whisk everything together, and pop it in your ice cream maker. Follow the manufacturer's directions.
If you don't have an ice cream machine, do what I did as a kid; shake it in a plastic bag!
If you'd like yours a little greener, add a tiny bit of green and yellow food dye. JUST A LITTLE. You don't want it looking too artificial XD
Put the sherbet in the freezer for a couple of hours to set up further and enjoy!
Wednesday, January 5
Rainbow Cookies
I think, by now, you guys are aware that I like making rainbow baked goods.
I have an unhealthy obsession with food coloring, and what better way to use it than in rainbows?
So, in my neverending quest to make enough rainbow food to drown my home state, I decided to go back to my baking roots: cookies!
I made these pretty much in the same way I made the rainbow bread; 7 unequal lumps of dough, colored and layered...though this was much much easier.
They're pretty simple, and you can flavor them any way you like...and I think your friends would find them cute (I do, at least, haha)


Rainbow Refrigerator Cookies: Makes 4 dozen
2.5 cups of flour
1/2 tsp baking powder
16 tablespoons of room temperature butter (2 sticks)
1 cup of sugar
1 tbsp of any extract or flavoring (vanilla, lemon, mint, whatever!)
1 egg
pinch of salt.
Cream together the butter and sugar. When that's light and fluffy, add in the egg, and the extract/flavoring.
Add in the rest of the ingredients, and mix until the dough comes together.
Divide the dough into 7 parts, but not equally! To make sure the layers of the rainbow are the same thickness, the portions have to get progressively larger (from purple to red)
Color the smallest portion purple, and so on, and the largest red.
Cover and chill the doughs in the fridge for an hour. (or in the freezer for 15 minutes if you're a lazy bum like me)
Roll the purple dough into a snake, about 1 1/2 feet long. (for cookies the size of mine, about 1 1/2 inches across. If you want bigger ones, make the snake shorter and thicker)
Roll out each color, in order to fit perfectly over the color before it, and trim any excess before adding the next color.
Preheat your oven to 350 degrees Fahrenheit.
Return the log to the fridge and chill until stiff enough to easily slice. (or the freezer again ;] )
Slice the log into 1/4 inch pieces, and places on a lined baking sheet.
Bake the cookies for 15 minutes, and let cool completely on a rack.
Enjoy :)
Monday, January 3
Duck Fat Fried Potatoes
So I did the whole shebang: duck, potatoes, and apple pie.
UNFORTUNATELY.
I felt like crud, and so by the time dinner was done, it was dark outside, and I was too tired to go all out on photos.
So when I went to edit them just now, all my pictures of the duck were blurry, and the pie just looked silly. I tried, but failed miserably at getting anything else.
So what do you get? Pics of the potatoes cooking :3
Now, the particular amounts of anything depends on how many people you're feeding, but because I looooove these potatoes, I ended up eating two potatoes worth of fries! Haha.
Duck fat fried potatoes: Serves 4 normal people. (not me.)
4 potatoes
Large non-stick pot or pan.
Enough duck fat to cover the potatoes.
2 tbs salt
2 tbs sugar
Peel the potatoes and cut them into 1-inch cubes (they'll shrink up quite a bit when cooking)
Set them in a bowl of cold water with the salt and sugar for an hour or two. If you don't have time, it's okay to skip this step, but it helps to make them crispier. I do it overnight if I know I'm going to be making them.
Drain them and dry them thoroughly.
Put the potatoes and fat in the pot, on medium heat. If you don't have enough fat to cover the potatoes (I never do), go ahead and add some canola or veggie oil. They still taste like you used all duckfat :)
Letting the potatoes come to temperature with the oil gives the insides time to cook so you don't have to do it twice or anything, it also works with regular french fries.
Now, when I used to do these, I would have sworn it took 30 minutes to cook, but this last time it seemed to take nearly an hour. In any case, you should be able to judge for yourself when they're done, based on how crispy you like them.
My dad loooves them really crispy, so I cook them for longer than I normally would.
While they're cooking, just check on them and flip them over, in case one side starts to brown too much.
When they're done, drain them on paper towels, sprinkle with salt, and enjoy.
Seriously, enjoy. They're so so so so so good.
:)
Saturday, January 1
Chocolate-Dipped Peppermint Meringues
So I'm back, sort of.
I got the urge to bake yesterday, and since meringues are so simple, I figured I'd made some more. :)
Not much of a story this time, I'm a bit under the weather, but I'm going to be making dinner tomorrow consisting of DUCK, duck fat fried potatoes, and an apple pie...so stay tuned for an in depth post on those, probably Monday. :)

Chocolate-Dipped Peppermint Meringues:
4 egg whites
1 cup of granulated sugar
1 tsp of cream of tartar (or lemon juice, if you prefer)
1 finely crushed candy cane
1 cup of melted chocolate (for much much later :) )
Preheat oven to 200 degrees Fahrenheit
Please please please do not whip these by hand, unless you have the arm strength of a thousand men.
Whip the egg whites and cream of tartar together until soft peaks form.
Add in the sugar, a few tablespoons at a time, with the mixer going until it's all incorporated. Whip until stiff peaks form. (dip the whisk in the whites, and the whites on it should stand straight up when you hold it up )
Mix in the candy cane powder, and put the meringue in a piping bag.
Line a cookie sheet with parchment paper, and pipe the meringues out in whatever shape/size you want.
Bake them for 2 hours
If you don't have as much time, or a short attention span, make them on the small side, and bake them for less time,but be certain to check them after an hour. (take one out, and let it cool for a bit on the counter, then check the doneness by snapping it in half)
(mine are fairly large, and browned because I spaced out while they were in the oven XD )
After letting them cool for a few minutes, dip the bottoms in chocolate, and set them back on the parchment paper until the chocolate sets up.
Enjoy! (and hide them from your relatives :3 )
Sunday, December 12
oof!
So I know I've been awful, but school's been crazy.
And I've also decided something.
I'm going to culinary school!
Well, first I'm leaving VCU and working so I can afford my uniform and various kits (I've got knives, but they're all chipped because /someone/ ran them through the dishwasher T____T )
And then in summer, hopefully, I'll be in the culinary arts program at J Sarge, and the pastry arts program after that :)
And so hopefully, that will give me new things to post here, especially sine I'll probably want to practice some things.
WOOH LIFE CHANGES!
Haha. But yeah, I think the universe was sending me signs that what I'm doing now is not what I'm supposed to be doing. So I'm trying to listen to those signs and change courses.
I think I'll look cute in a chef's coat, checkered pants, and toque :3
Wednesday, November 17
Pumpkin Pie Spice Meringues!
You know, every time I go to type "meringue", I always want to type "merengue" instead.
Interesting Kiara Tidbit o' the Day! XD
Anyhoooo. Last night, I whipped egg whites by hand for an hour while watching TV, because my mixer bowl was dirty and I figured I could use the exercise.
I have poor decision-making skills, obviously.
Anyway, here are pictures, and the recipe! :)
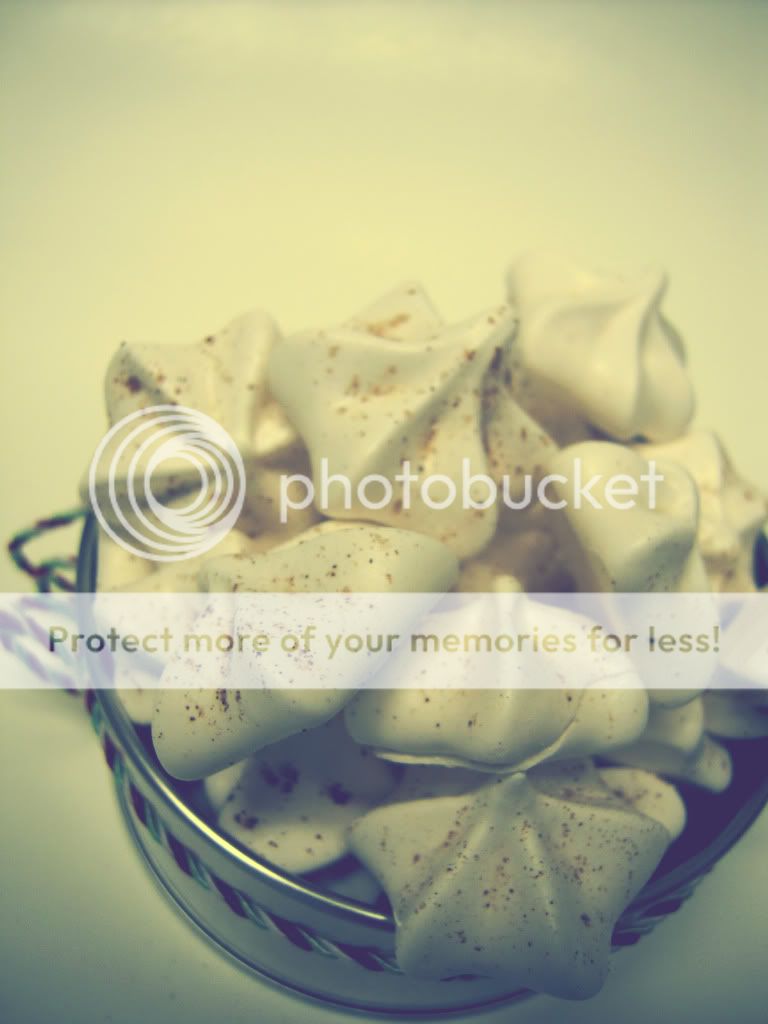
I couldn't decide which I liked better XD
Pumpkin Pie Spice Meringues:
1 cup granulated sugar
3 egg whites
1 tsp of vinegar (or cream of tartar. You need acid, that's all :) )
1 tbs pumpkin pie spice (cinnamon, nutmeg, cloves, ginger)
Tiny dab of orange food coloring.
Preheat the oven to 200 degrees Fahrenheit. This won't take long, so I'd do it when you're almost done whipping the egg whites.
Whip the egg whites until frothy, then slowly add in the sugar.
Then add the vinegar and spices, and continue to whip.
When it gets to soft peaks, add in the food coloring.
Whip whip whip whip whip until they're stiff, glossy peaks. (they'll hold their shape when you lift the whisk straight up, the tip should curl over , but it should be a defined peak)
You can either just put the meringue into a sandwich baggie and cut the tip off and pipe little blobs, or put a nice tip in a pastry bag. I used a Wilton 1M for mine.
Now the baking time really depends on your oven and the size of the meringues, so the first time you make them, I'd suggest making a small test batch (if you have time), or to at least make more than you need, so you can break a couple open and check if they're done.
For me, personally, these needed about an hour. Generally, they'll take between that and 2 hours, but like I said, it depends on their size, and your particular oven. :)
Tuesday, November 16
Funny Story.
Okay, not really.
But I tried to make macarons.
They were epic fail. (I'm unsurprised)
I was going to take pictures anyway, but my camera's battery died.
And I can't find the charger.
Obviously, the universe wants to spare you from the horror of seeing such ugly creations.
You're welcome.
XD
Sunday, November 7

Monday, October 11
Blueberry Japanese Cheesecake
Ooooooh.
I love cheesecake.
It's pretty odd how much I love cheesecake, considering that I'm not a fan of cold cheese...but I guess cream cheese is in a category of its own.
Japanese cheesecake is the child of a beautiful affair between cheesecake and sponge cake, haha. It's so light and fluffy, but still manages to taste like cheesecake, and even have that same creaminess.
I tried to make it once before, but that was a flop. I don't quite remember what was wrong, but trust me...it was wrong. XD
Anyhoo, I'm not feeling too well today :( so I'm just gonna get right to the pictures and the recipe.
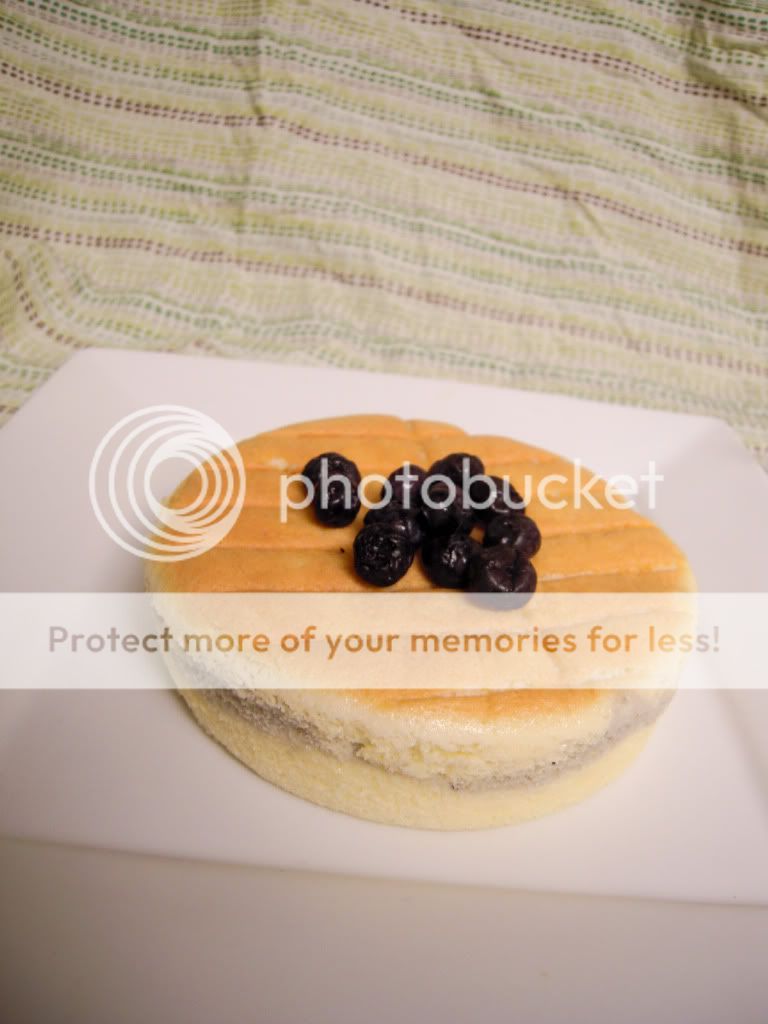

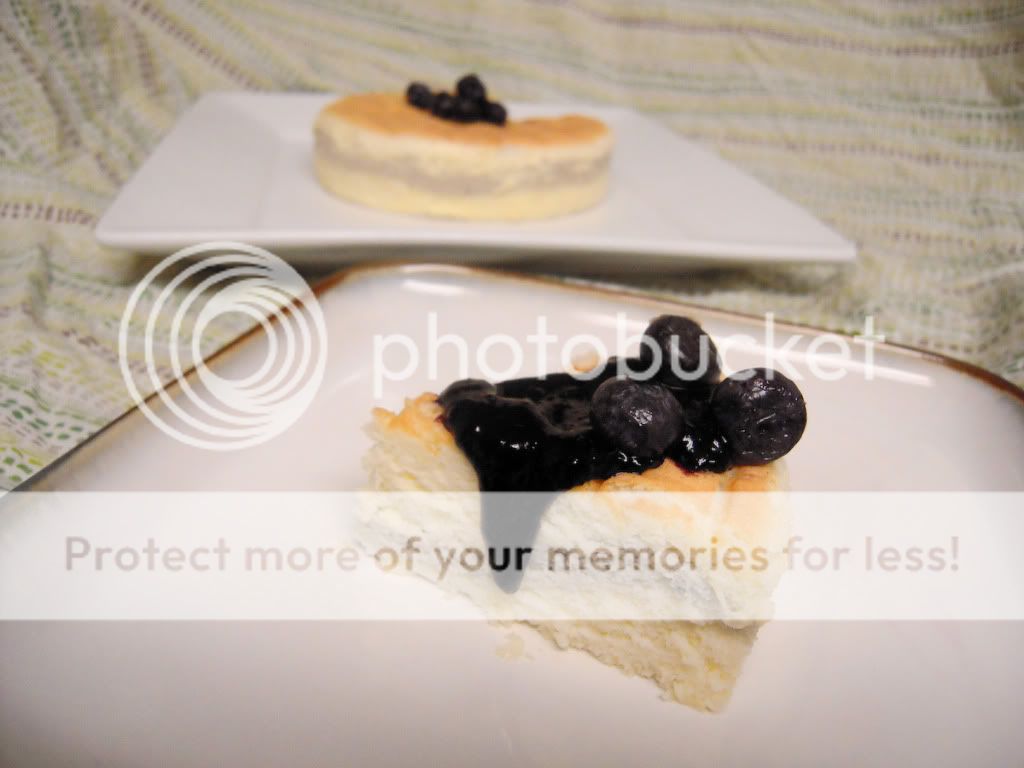
 (just to show you my tin floating in its bath, haha)
Japanese Cotton Cheesecake w/ Blueberry layering:
4 ounces of room temperature cream cheese.
1.5 tablespoons of butter
2.5 tablespoons of heavy cream
1/2 cup of granulated sugar
3 eggs, separated
1/4 teaspoon of cream of tartar
1/3 cup of flour
1 tsp baking powder
2 tablespoons of blueberry sauce (literally just cook and squish the berries over medium heat, and strain)
Place a tray in the oven, filled with an inch of water, large enough to hold your pan. (I used a 6 inch pan for this recipe). If you're using a springform pan for your cheesecake, be sure to wrap the outside in foil so the water doesn't seep in.
Melt the butter and cream cheese with the cream over medium-low heat, stirring occasionally. Stir until it's completely smooth, then set it aside to cool.
Once it's cool, whisk in the yolks.
Mix the flour and baking powder into the cream cheese mixture, being careful to not overmix it.
Depending on how much of the blueberry you want, divide the batter into 2 (i did 1/3 and 2/3), and mix the blueberry sauce into one part.
Meanwhile, whisk the egg whites with the cream of tartar until frothy. Then add the sugar, a few tablespoons at a time, while whisking the egg. Continue until the whites are medium peaks. Fold the egg white into both mixtures, and pour it into the pan. (I did half of the plain, then the blueberry, then the rest of the plain)
Carefully set the pan into the hot water bath, and bake it for 50-60 minutes. Don't open the oven until it's close to ready! When you think it's ready, the top should be a nice brown, and do the toothpick test (stick a toothpick in the middle of the cake, and if it comes out clean, you're good)
Immediately turn the cake out onto a cooling rack and let it cool for 30 minutes. Then wrap it and place it in the fridge until you're ready to serve it.
Serve with whipped cream and/or extra blueberry sauce. (I think the unsweetened juice is a really nice contrast to the sweet cake :D )
Saturday, October 9
Mini Fall Cookies!
So the muffins were good...still not exactly what I was looking for in a muffin, so I'll hold off on posting those for now.
Buuuuut, I do have more cookies to share!
These are mini cookies shaped like oak leaves, maple leaves, pumpkins and acorns.
I have learned, through a couple of days of decorating mini cookies, that they are 5 billion times more work than regular cookies. So much less room to work on, and just so /many/ to do in the first place.
But they're so cute! So I think I'm going to have to get mini cutters for every season...like I don't have enough cookie cutters as it is...my storage drawers are almost full, haha.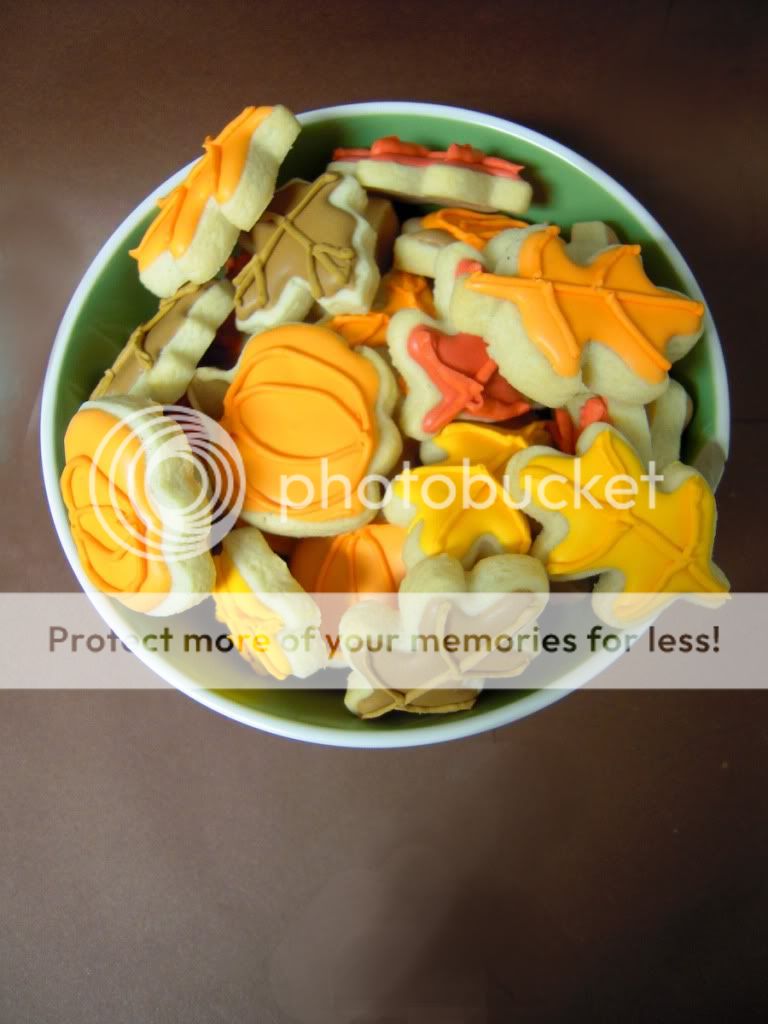


Just like the Halloween ones, you can make 'em yourself
or I can make them for you :)
I am worn out. Hahaha.
Subscribe to:
Posts (Atom)


